Bitlocker - Volume - Initialize
Summary
This is a CW RMM implementation of the agnostic script Initialize-BitLockerVolume. The script can be used to manually encrypt a drive with BitLocker disk encryption.
Requirement: PowerShell v5+
Sample Run
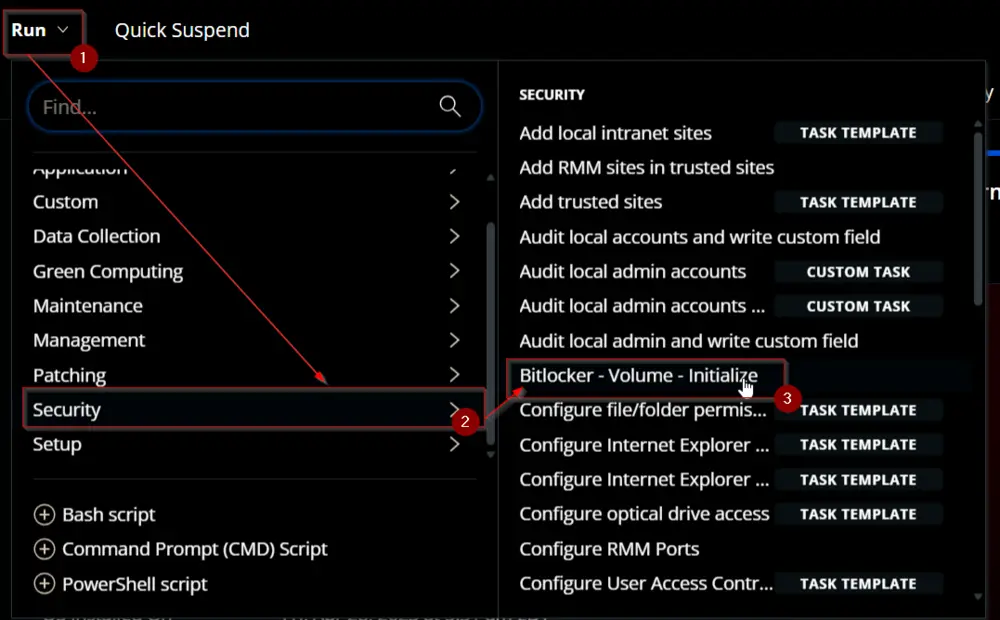
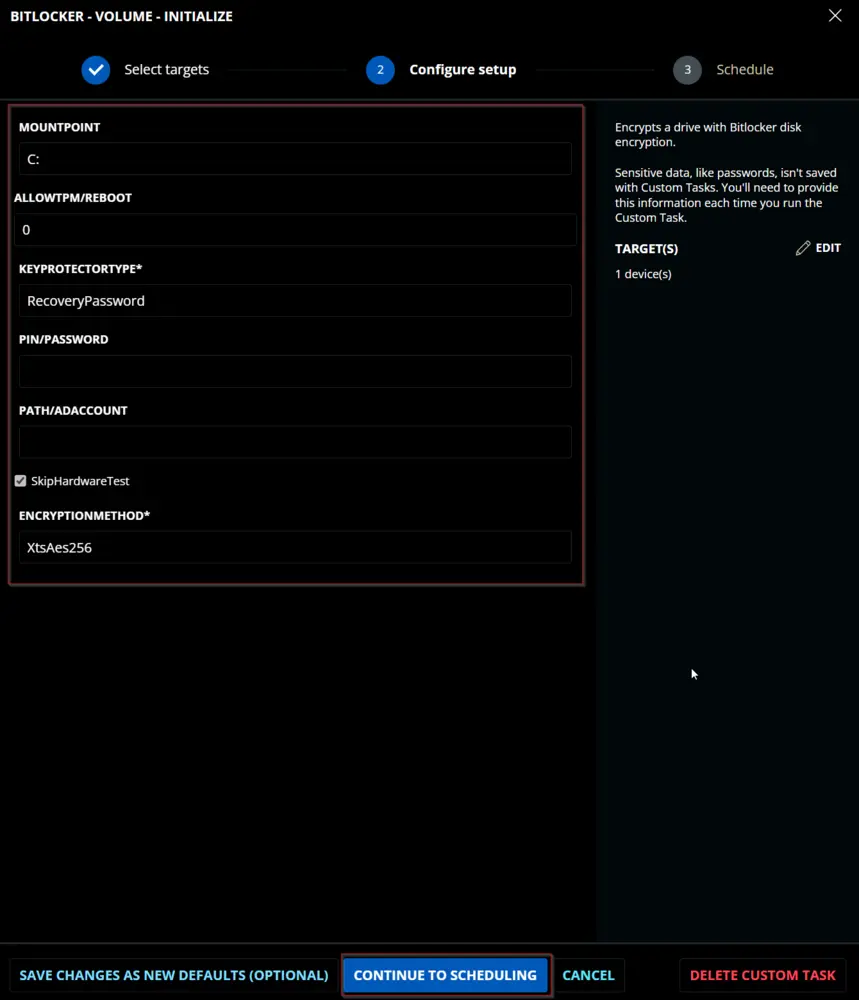
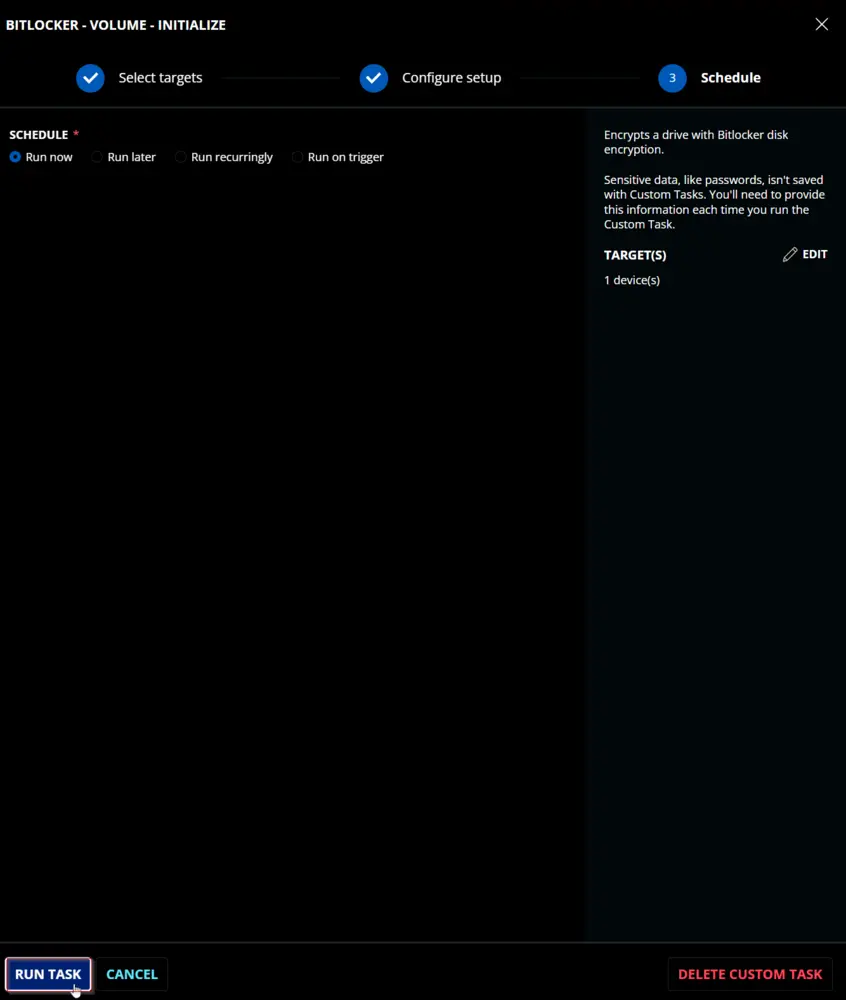
Dependencies
User Parameters
| Name | Example | Accepted Values | Required | Default | Type | Description |
|---|---|---|---|---|---|---|
| Mount Point | E: | False | C: | Text | The volume to protect. Defaults to the system drive. | |
| Allow TPM/Reboot | 3 | 0,1,2,3 | False | 0 | Number | Options for allowing TPM initialization and rebooting. 0 = Do not allow, 1 = Allow TPM Initialization, 2 = Allow Reboot, 3 = Allow TPM Initialization and Reboot |
| Key Protector Type | RecoveryPassword | Tpm, TpmStartup, TpmPinStartup, Password, Startup, RecoveryKey, RecoveryPassword, AdAccount | True | Text | Options for which type of protector to use for BitLocker: Tpm, TpmPin (Requires PIN/Password parameter), TpmStartup (Requires Path/ADAccount parameter), TpmPinStartup (Requires PIN/Password and Path/ADAccount parameters), Password (Requires PIN/Password parameter), Startup (Requires Path/ADAccount parameter), RecoveryKey (Requires Path/ADAccount parameter), RecoveryPassword, AdAccount (Requires Path/ADAccount parameter) | |
| PIN/Password | - 123456- Pa$sw0rD!- 123456-654321-123456-654321-123456-654321 | Semi | Text | Option for the PIN or Password needed for specific key protector types. | ||
| Path/ADAccount | - F://Recovery- CONTOSO//ContosoUser- CONTOSO//ContosoGroup | Semi | Text | Option for the Path or AD Account needed for specific key protector types. | ||
| SkipHardwareTest | Checked | False | Checked | Flag | Mark this checkbox to enable BitLocker without forcefully validating the hardware. | |
| EncryptionMethod | XtsAes256 | Aes128, Aes256, XtsAes128, XtsAes256 | True | XtsAes256 | Text | The encryption method that will be used to protect the target volume. Valid options are: Aes128, Aes256, XtsAes128, XtsAes256 |
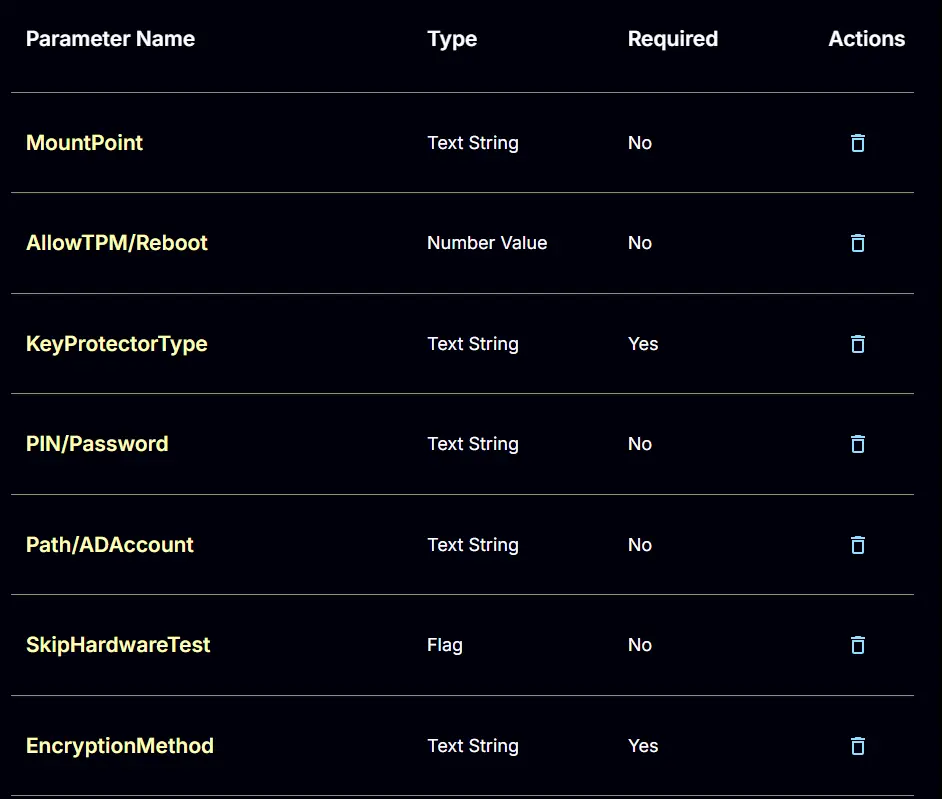
Key Protector Types
| Type | Description |
|---|---|
| Tpm | Protect the encrypted drive with only the TPM chip. |
| TpmPin | Protect the encrypted drive with the TPM chip and a PIN. Requires the PIN/Password parameter to be passed. |
| TpmStartup | Protect the encrypted drive with the TPM chip and a startup key. Requires the Path/ADAccount parameter. |
| TpmPinStartup | Protect the encrypted drive with the TPM chip, a PIN, and a startup key. Requires the PIN/Password and Path/ADAccount parameters. |
| Password | Protects the encrypted drive with a custom password. Requires the PIN/Password parameter to be passed. |
| Startup | Protect the encrypted drive with a startup key. Requires the Path/ADAccount parameter. |
| RecoveryKey | Protect the encrypted drive with a recovery key. Requires the Path/ADAccount parameter. |
| RecoveryPassword | Protect the encrypted drive with a recovery password. If the PIN/Password parameter is not passed, the script will generate one automatically. |
| AdAccount | Protect the encrypted drive with an Active Directory Account or Group. Requires the Path/ADAccount parameter. |
Task Creation
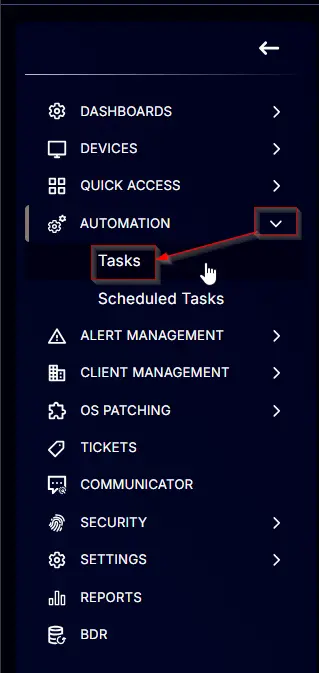
Create a new Script Editor style script in the system to implement this Task.

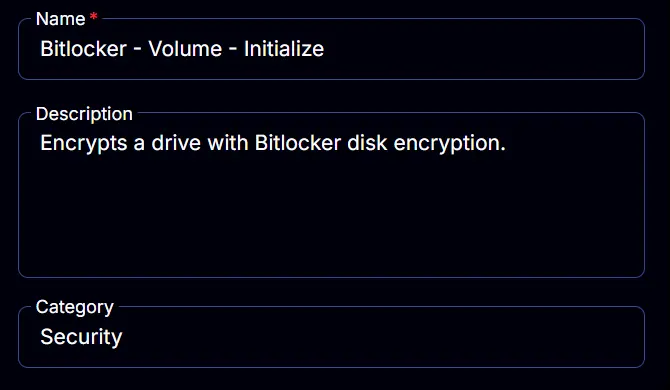
Name: Bitlocker - Volume - Initialize
Description: Encrypts a drive with BitLocker disk encryption.
Category: Security
Parameters
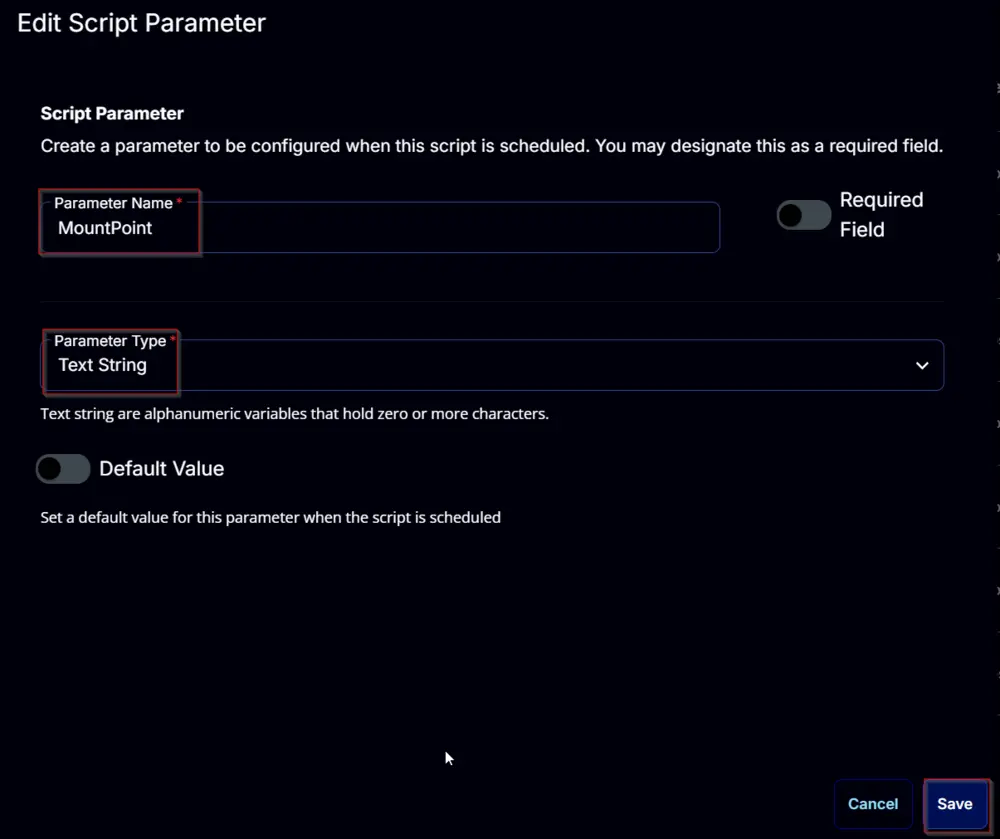
MountPoint:
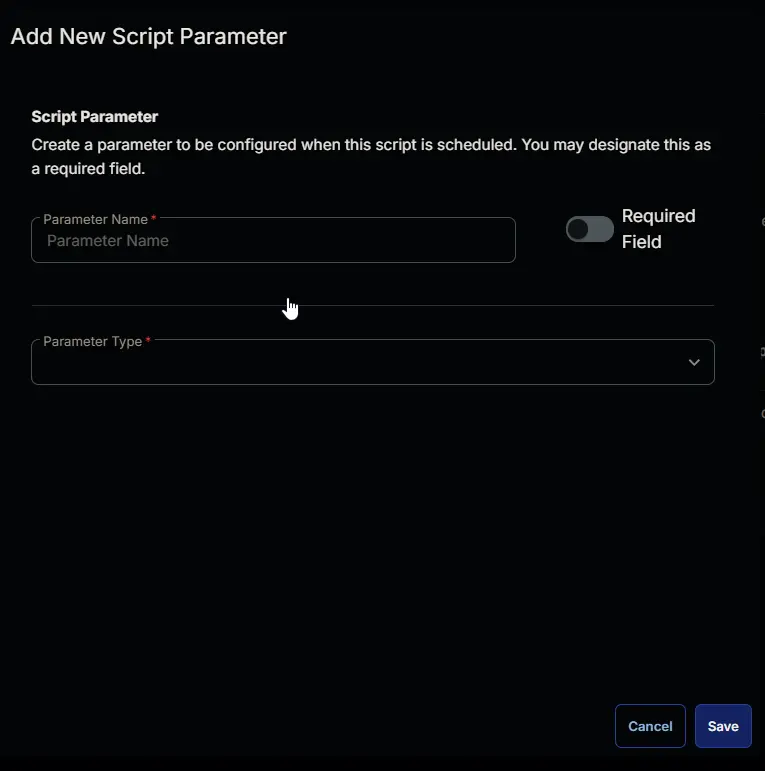
Add a new parameter by clicking the Add Parameter button present at the top-right corner of the screen.

This screen will appear.
- Set
MountPointin theParameter Namefield. - Select
Text Stringfrom theParameter Typedropdown menu. - Click the
Savebutton.
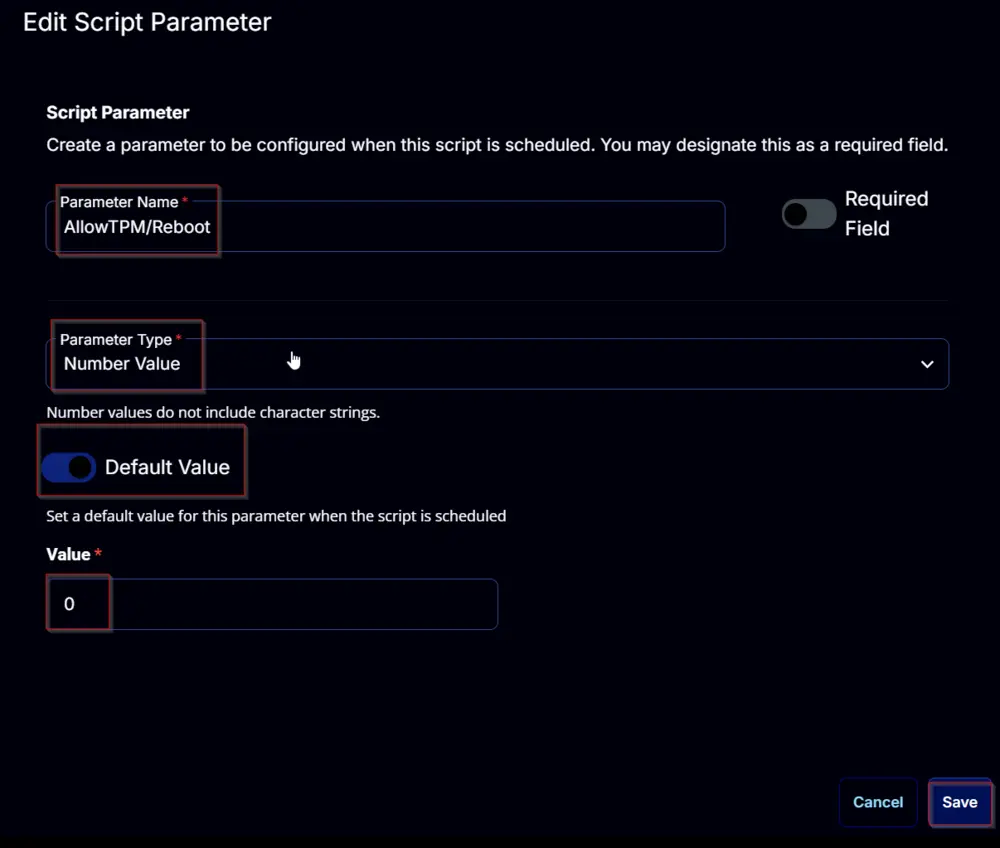
AllowTPM/Reboot:
Add a new parameter by clicking the Add Parameter button present at the top-right corner of the screen.
This screen will appear.
- Set
AllowTPM/Rebootin theParameter Namefield. - Select
Number Valuefrom theParameter Typedropdown menu. - Enable the
Default Valuebutton. - Set
0in theValuefield. - Click the
Savebutton.
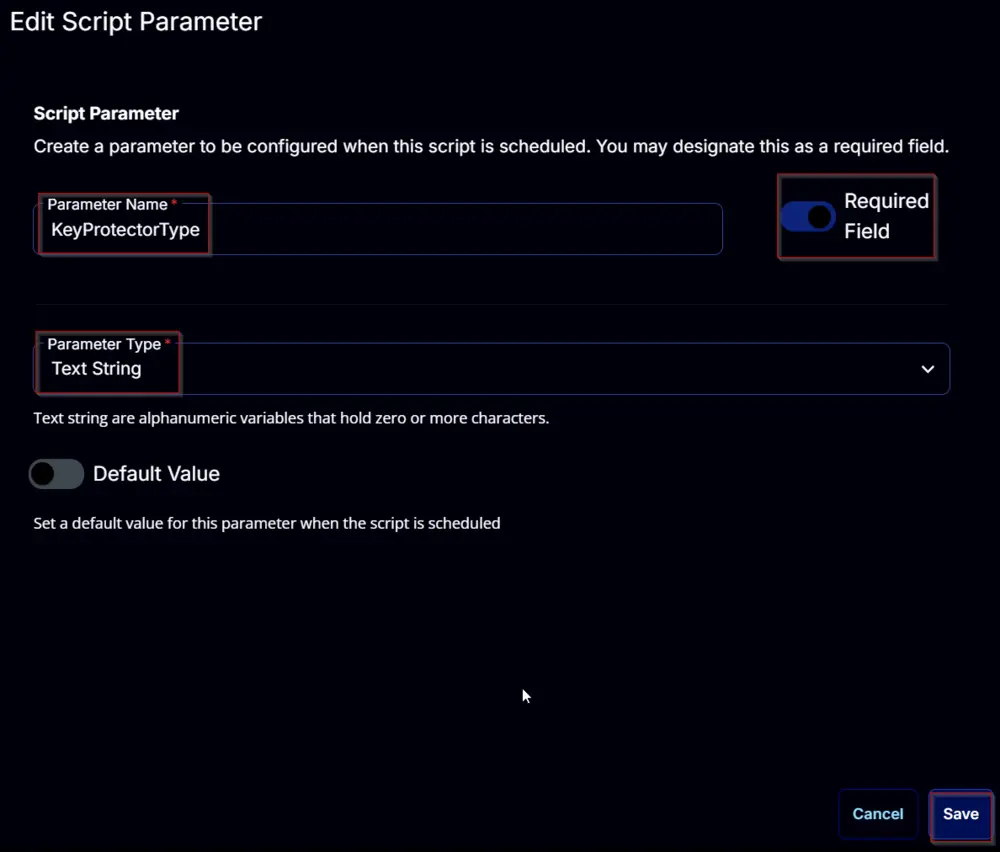
KeyProtectorType:
Add a new parameter by clicking the Add Parameter button present at the top-right corner of the screen.
This screen will appear.
- Set
KeyProtectorTypein theParameter Namefield. - Select
Text Stringfrom theParameter Typedropdown menu. - Enable the
Required Fieldbutton. - Click the
Savebutton.
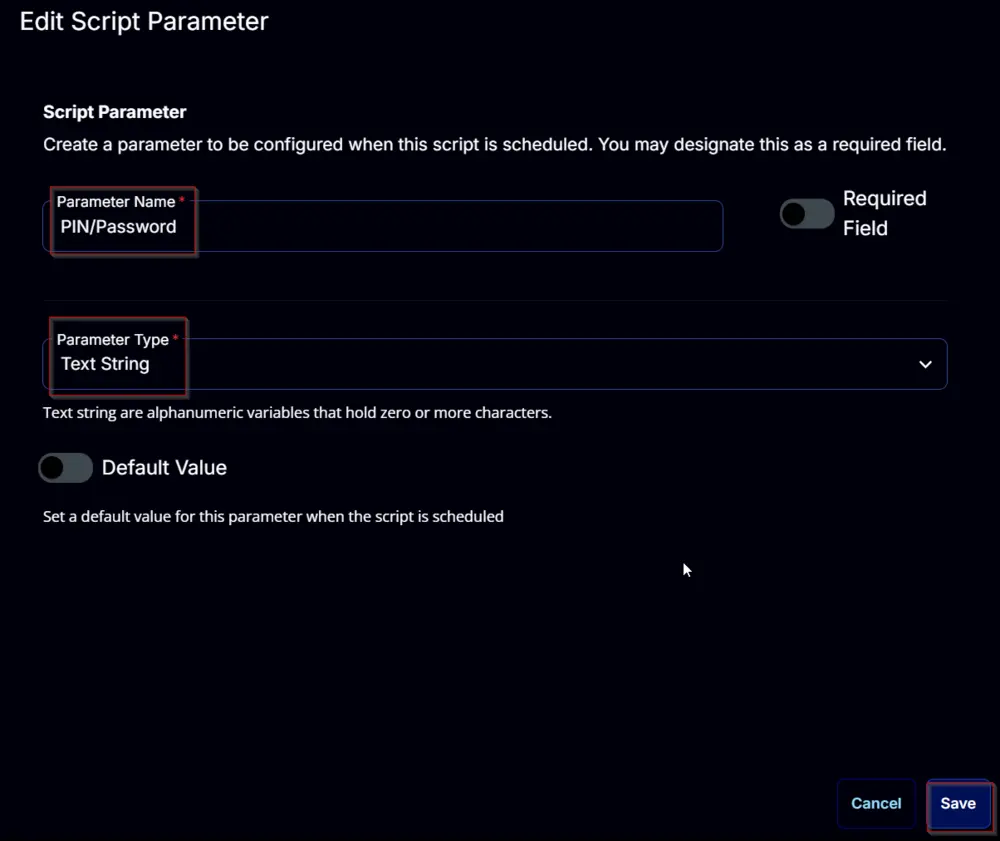
PIN/Password:
Add a new parameter by clicking the Add Parameter button present in the top-right corner of the screen.
This screen will appear.
- Set
PIN/Passwordin theParameter Namefield. - Select
Text Stringfrom theParameter Typedropdown menu. - Click the
Savebutton.
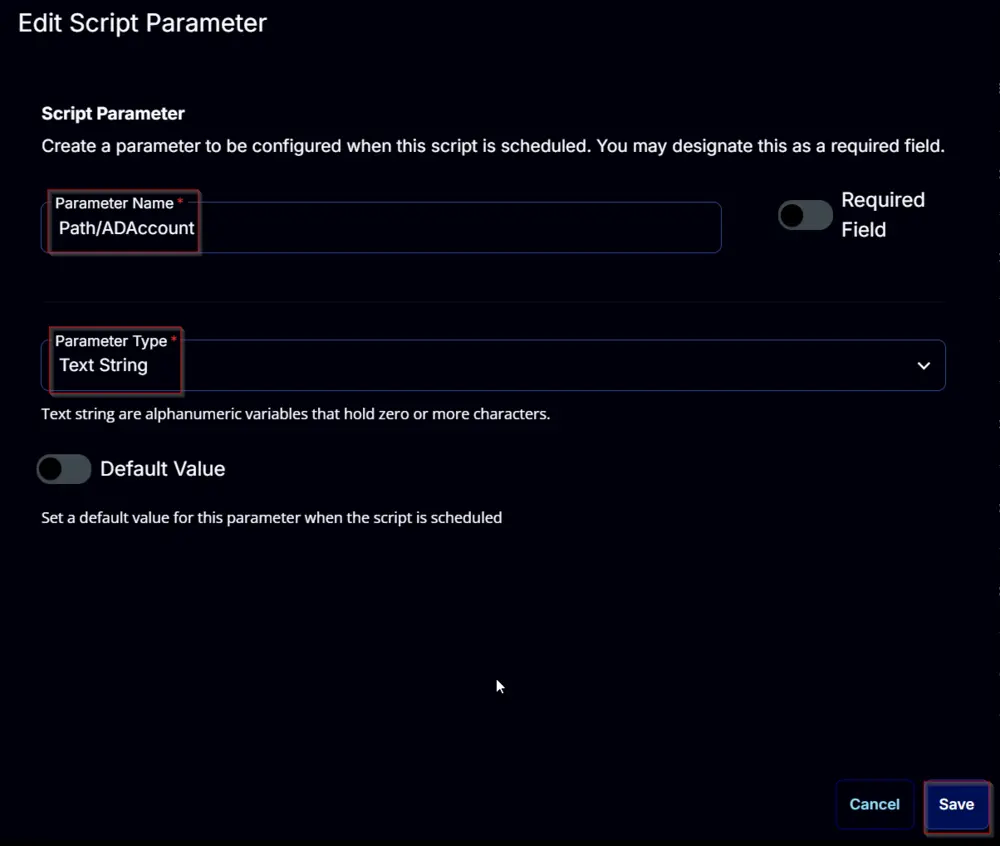
Path/ADAccount:
Add a new parameter by clicking the Add Parameter button present in the top-right corner of the screen.
This screen will appear.
- Set
Path/ADAccountin theParameter Namefield. - Select
Text Stringfrom theParameter Typedropdown menu. - Click the
Savebutton.
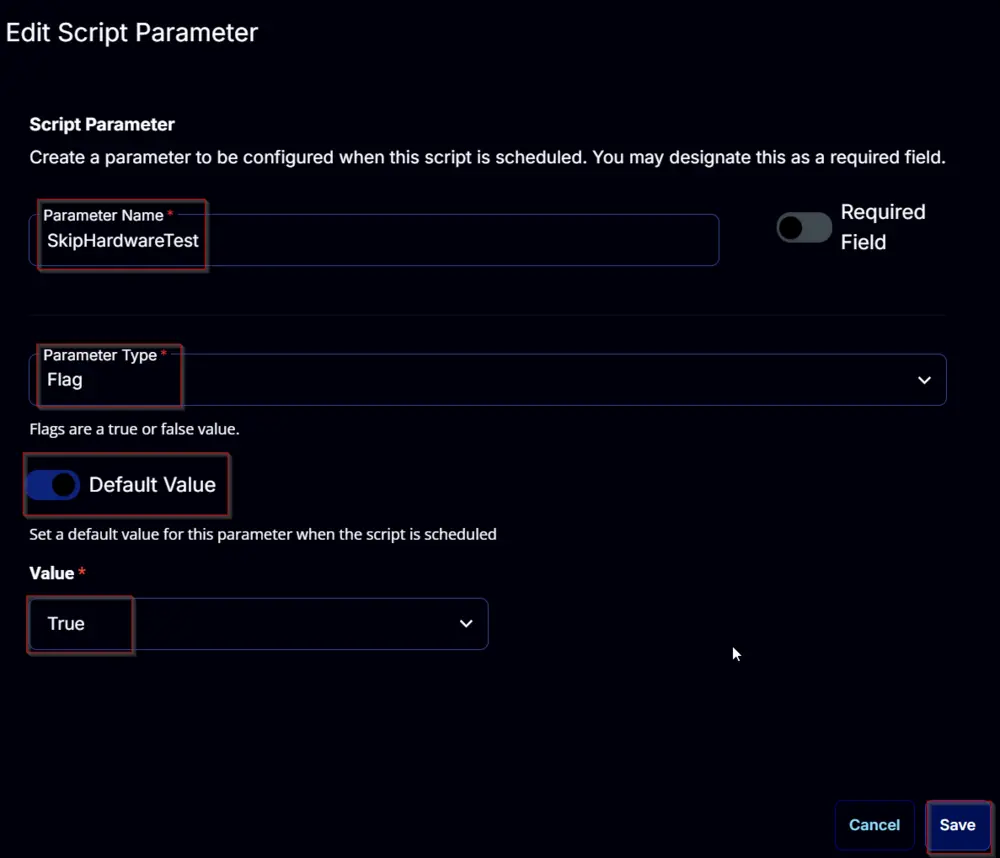
SkipHardwareTest:
Add a new parameter by clicking the Add Parameter button present in the top-right corner of the screen.
This screen will appear.
- Set
SkipHardwareTestin theParameter Namefield. - Select
Flagfrom theParameter Typedropdown menu. - Enable the
Default Valuebutton. - Set
Truein theValuefield. - Click the
Savebutton.
EncryptionMethod:
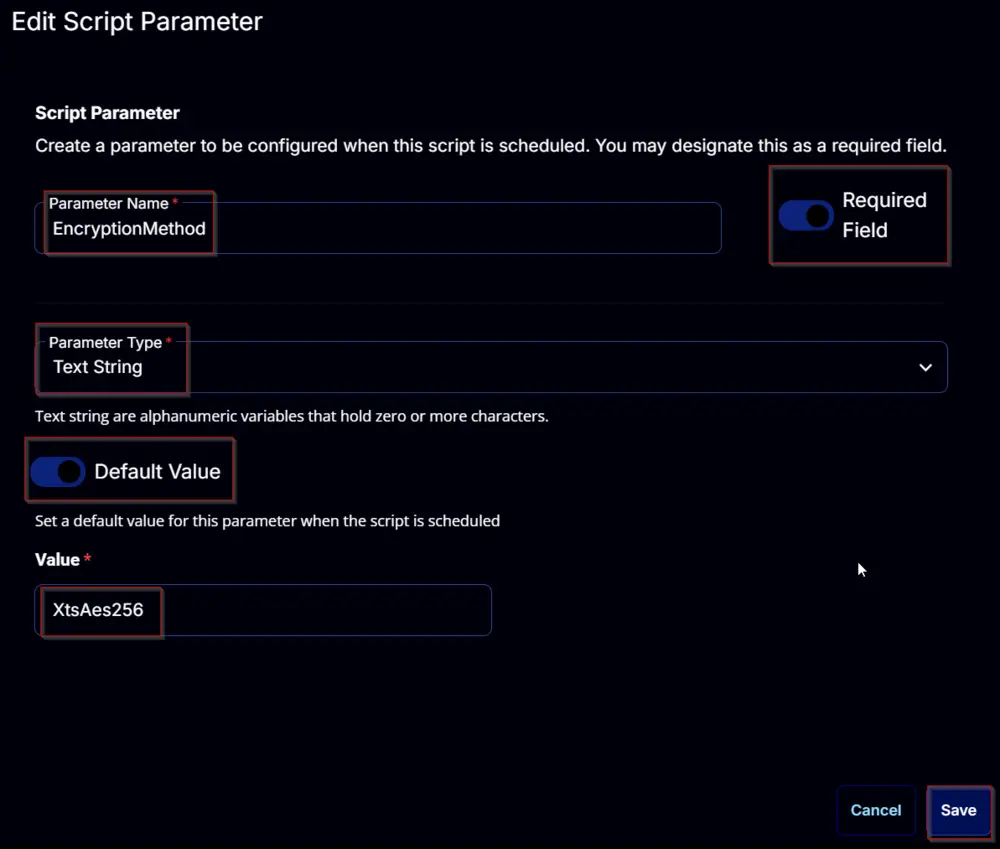
Add a new parameter by clicking the Add Parameter button present in the top-right corner of the screen.
This screen will appear.
- Set
EncryptionMethodin theParameter Namefield. - Select
Text Stringfrom theParameter Typedropdown menu. - Enable the
Required Fieldbutton. - Enable the
Default Valuebutton. - Set
XtsAes256in theValuefield. - Click the
Savebutton.
Task
Navigate to the Script Editor Section and start by adding a row. You can do this by clicking the Add Row button at the bottom of the script page.

A blank function will appear.

Row 1 Function: PowerShell Script
Search and select the PowerShell Script function.


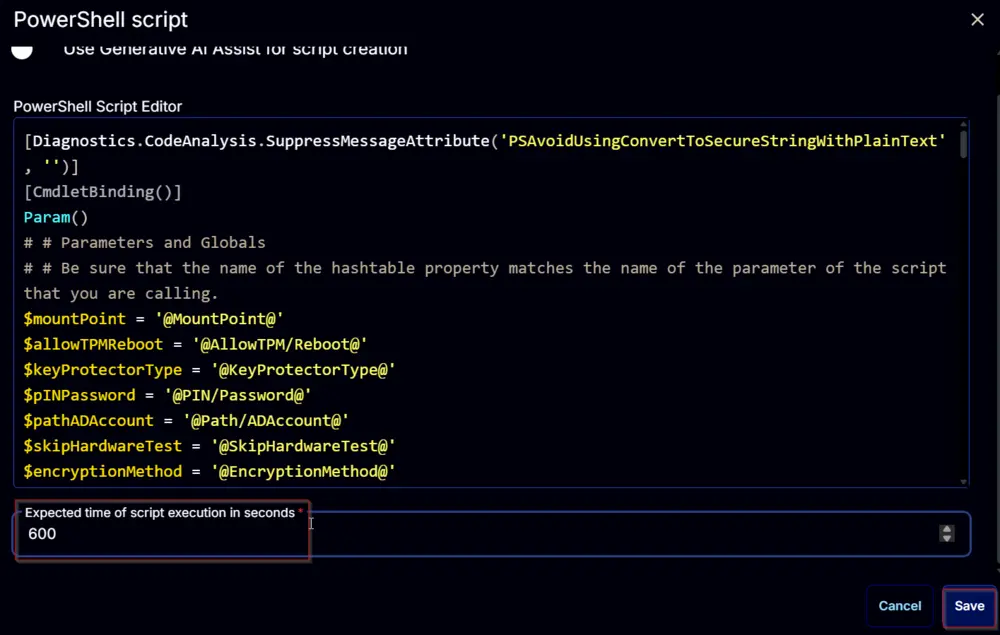
The following function will pop up on the screen:

Paste in the following PowerShell script and set the Expected time of script execution in seconds to 600 seconds. Click the Save button.
Row 2 Function: Script Log
Add a new row by clicking the Add Row button.

A blank function will appear.

Search and select the Script Log function.

The following function will pop up on the screen:

In the script log message, simply type %output% and click the Save button.

Click the Save button at the top-right corner of the screen to save the script.

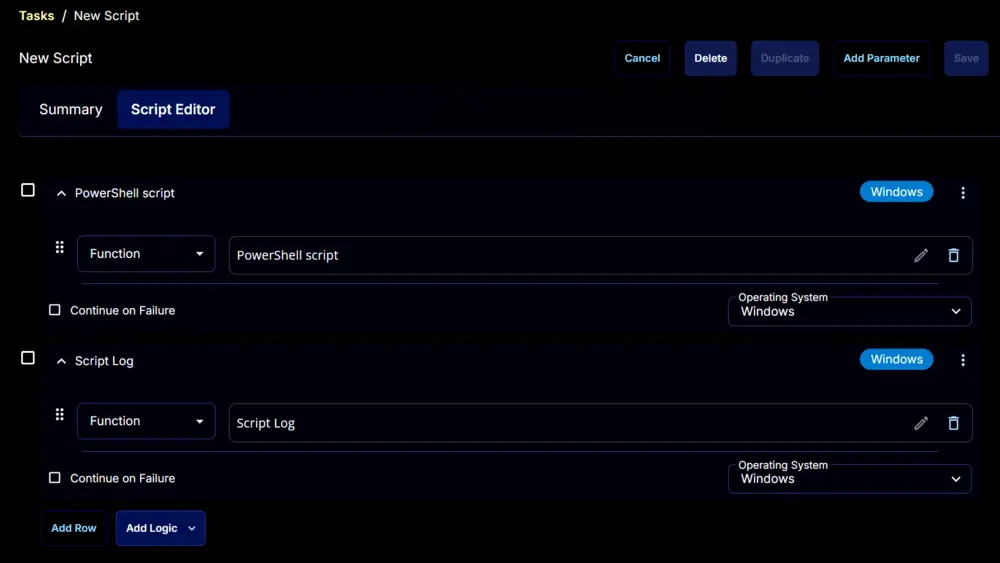
Completed Task
Output
- Script log
Changelog
2025-04-10
- Initial version of the document