Create - Desktop Shortcut
Summary
This document describes how to create a shortcut in the Public Desktop folder.
Sample Run

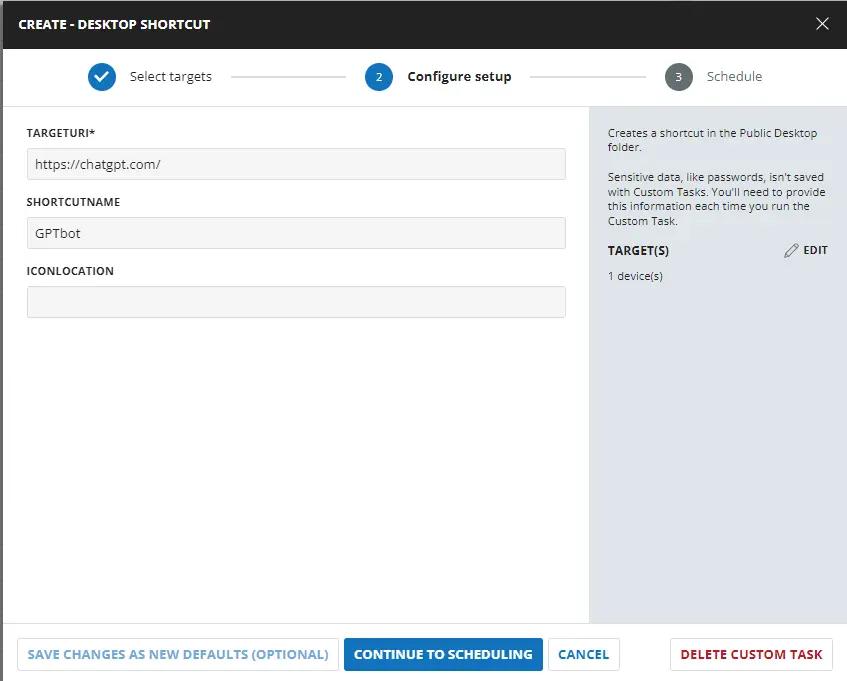
To add a desktop shortcut for https://chatgpt.com/:
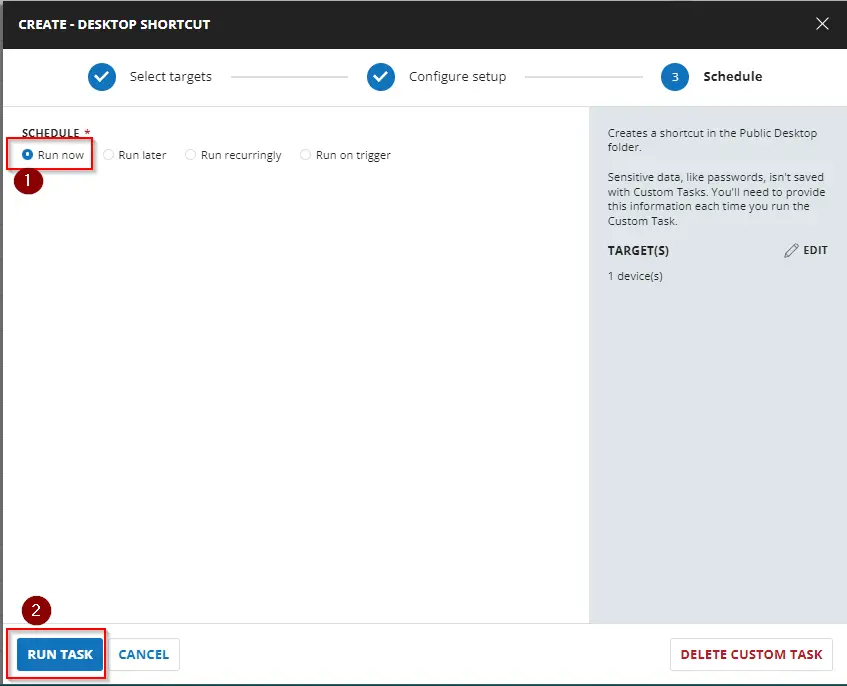
Select Run Now and click on Run Task:
Dependencies
User Parameters
| Name | Example | Required | Description |
|---|---|---|---|
| TargetUri | https://www.google.com/ | True | The target path of the shortcut. This can be a local or web URI. Must begin with '<DRIVE_LETTER>:/', 'Https://', or 'http://' |
| ShortcutName | False | The optional name of the shortcut being set. If not provided, the file name or DnsSafeHost property will be used as the shortcut name. | |
| IconLocation | -- | False | Optionally set an *.ico file as the shortcut icon. |
Implementation
Create a new Script Editor style script in the system to implement this task.

Name: Create - Desktop Shortcut
Description: Creates a shortcut in the Public Desktop folder.
Category: Management

Parameters
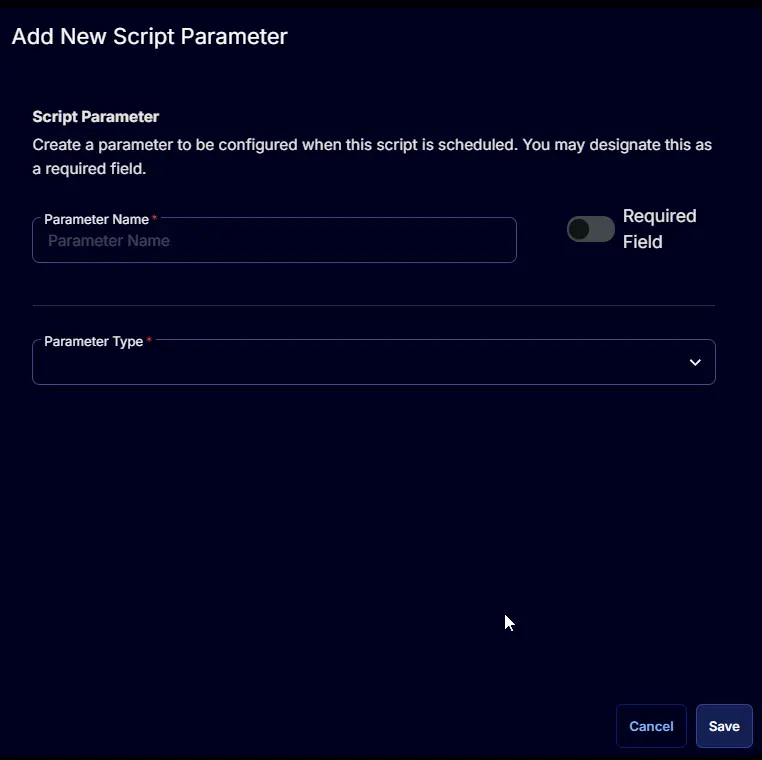
Add a new parameter by clicking the Add Parameter button present at the top-right corner of the screen.

This screen will appear.
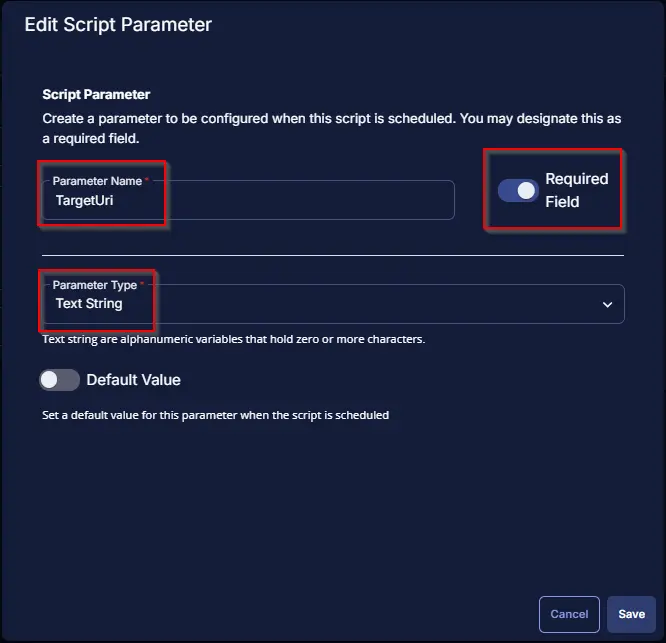
TargetUri
- Set
TargetUriin theParameter Namefield. - Select
Text Stringfrom theParameter Typedropdown menu. - Toggle ON the
Required Fieldbutton. - Click the
Savebutton.
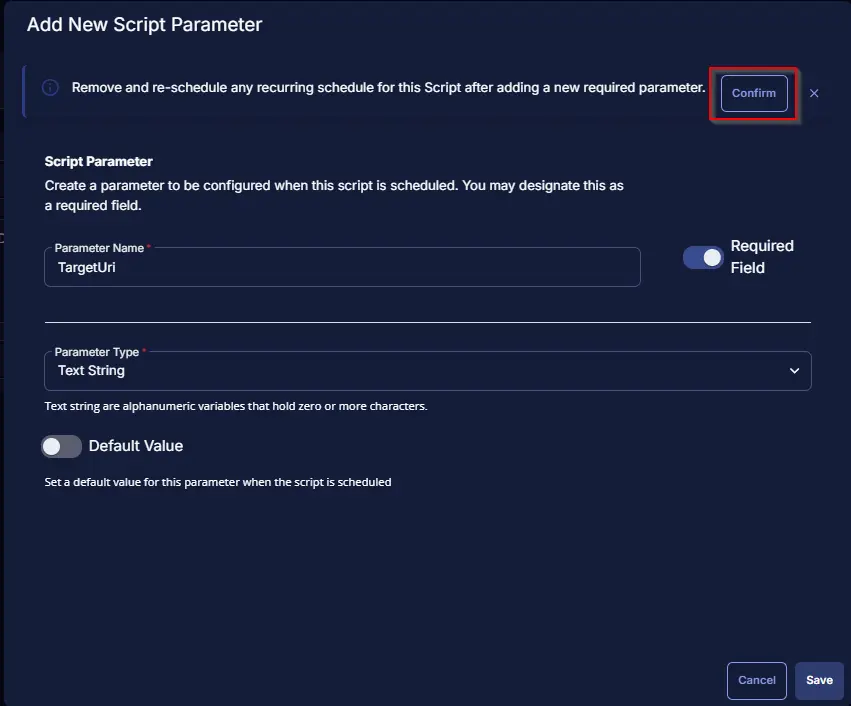
Click the Confirm button to save the parameter.
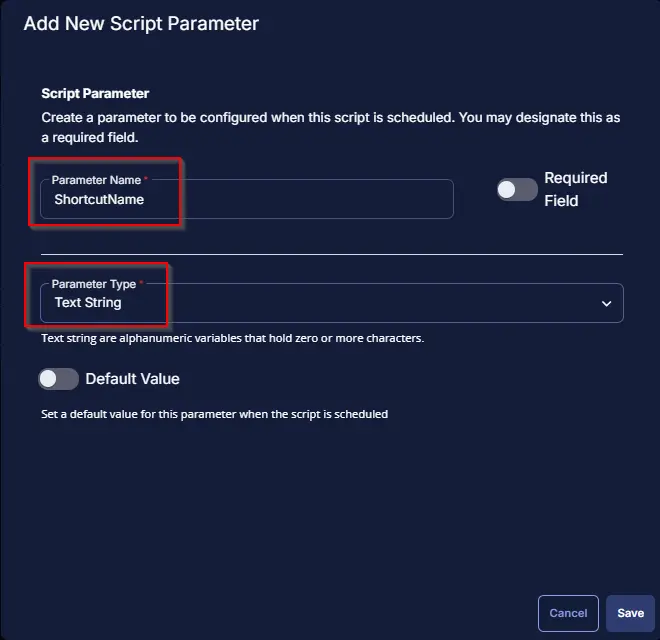
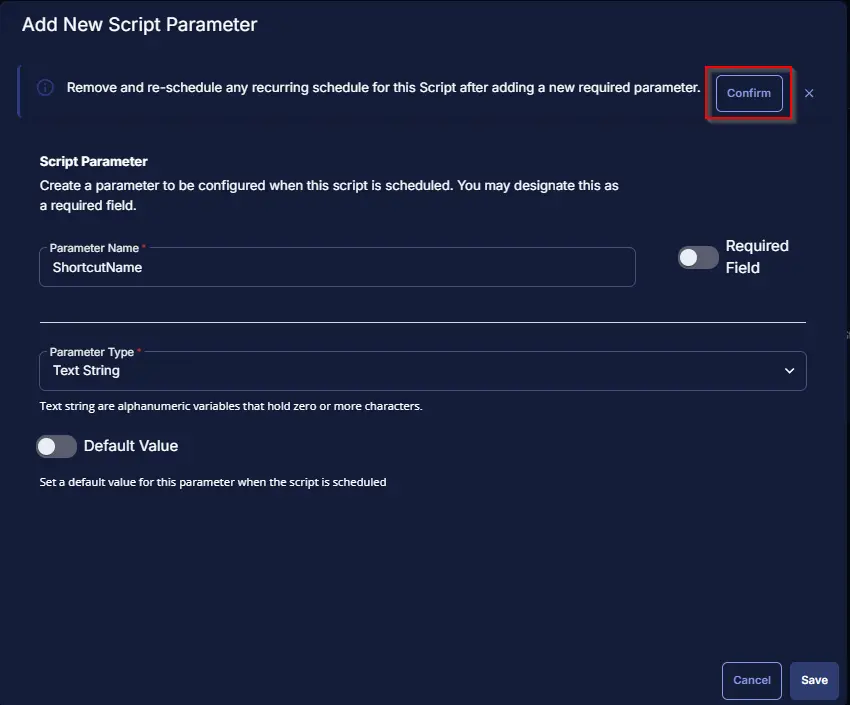
ShortcutName
- Set
ShortcutNamein theParameter Namefield. - Select
Text Stringfrom theParameter Typedropdown menu. - Click the
Savebutton.
Click the Confirm button to save the parameter.
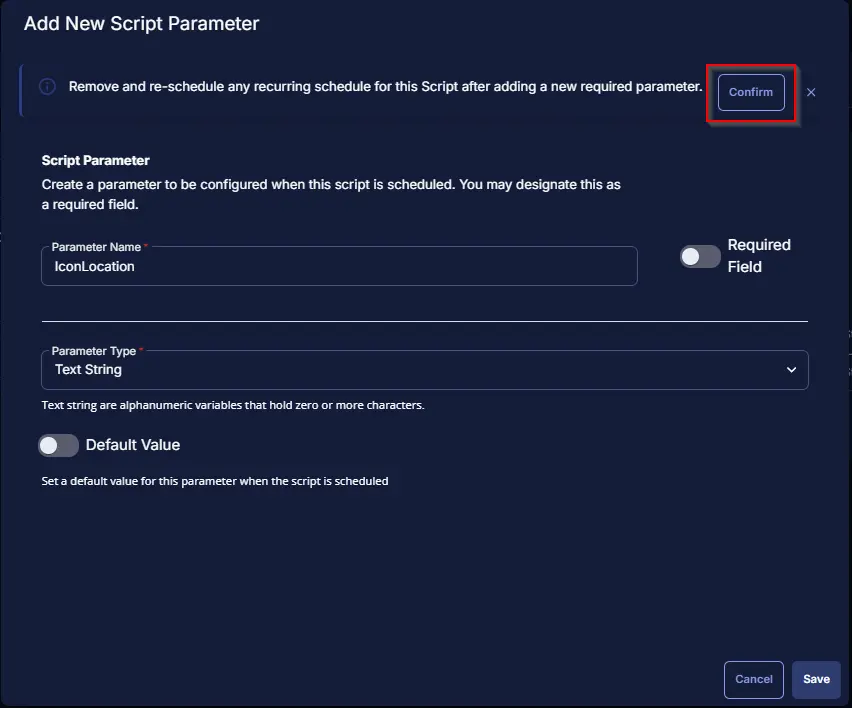
IconLocation
- Set
IconLocationin theParameter Namefield. - Select
Text Stringfrom theParameter Typedropdown menu. - Click the
Savebutton.
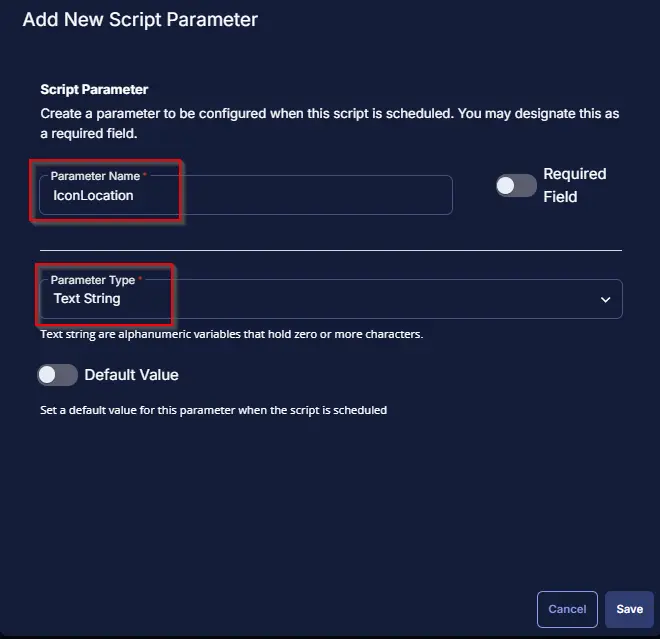
Click the Confirm button to save the parameter.
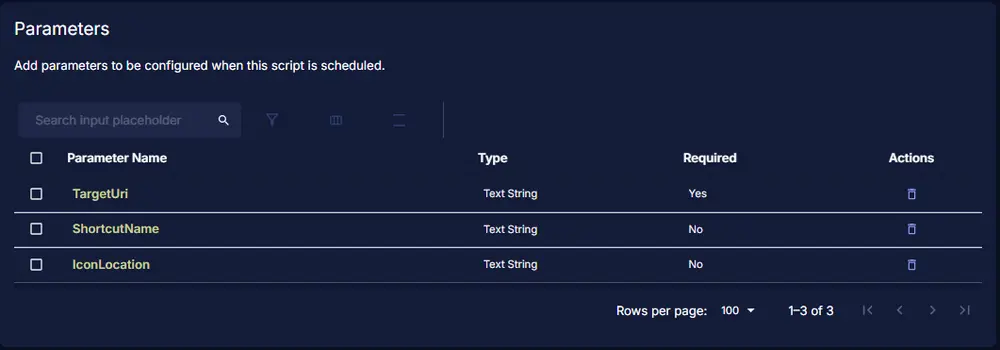
Once all the parameters are created, it should look like this:

Proceed with the following steps to create a task.
Task
Navigate to the Script Editor section and start by adding a row. You can do this by clicking the Add Row button at the bottom of the script page.

A blank function will appear.

Row 1 Function: PowerShell Script
Search and select the PowerShell Script function.

The following function will pop up on the screen:

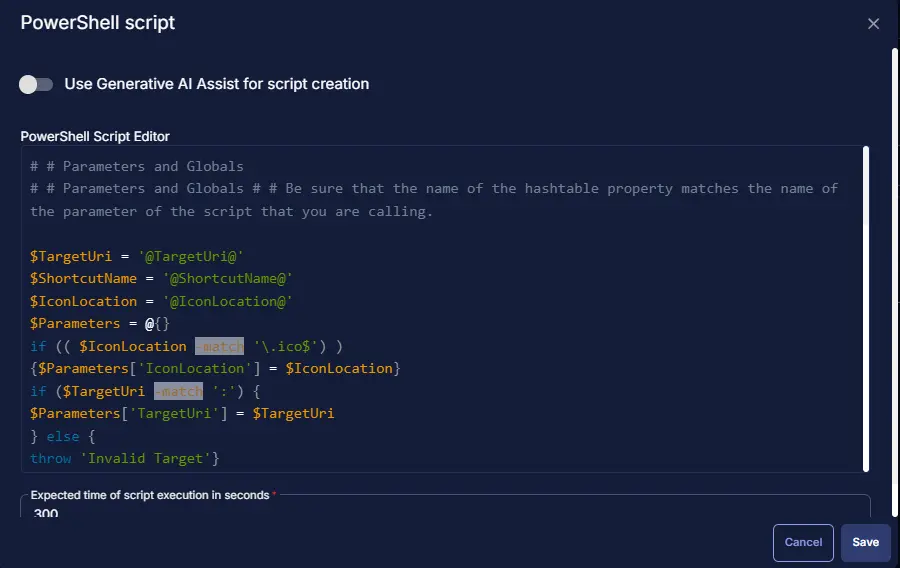
Copy the below PowerShell commands and paste them in the PowerShell Script Editor box:
# # Parameters and Globals
# # Parameters and Globals # # Be sure that the name of the hashtable property matches the name of the parameter of the script that you are calling.

$TargetUri = '@TargetUri@'
$ShortcutName = '@ShortcutName@'
$IconLocation = '@IconLocation@'
$Parameters = @{}

if (( $IconLocation -match '\.ico$') )
{$Parameters['IconLocation'] = $IconLocation}

if ($TargetUri -match ':') {
$Parameters['TargetUri'] = $TargetUri
} else {
throw 'Invalid Target'}

$Parameters['ShortcutName'] = $ShortcutName

#region Setup - Variables
$ProjectName = 'New-DesktopUriShortcut'
[Net.ServicePointManager]::SecurityProtocol = [enum]::ToObject([Net.SecurityProtocolType], 3072)
$BaseURL = 'https://file.provaltech.com/repo'
$PS1URL = "$BaseURL/script/$ProjectName.ps1"
$WorkingDirectory = "C:\ProgramData\_automation\script\$ProjectName"
$PS1Path = "$WorkingDirectory\$ProjectName.ps1"
$Workingpath = $WorkingDirectory
$LogPath = "$WorkingDirectory\$ProjectName-log.txt"
$ErrorLogPath = "$WorkingDirectory\$ProjectName-Error.txt"
#endregion

#region Setup - Folder Structure
New-Item -Path $WorkingDirectory -ItemType Directory -ErrorAction SilentlyContinue | Out-Null
try {
    Invoke-WebRequest -Uri $PS1URL -OutFile $PS1path -UseBasicParsing -ErrorAction Stop
} catch {
    if (!(Test-Path -Path $PS1Path )) {
        throw ('Failed to download the script from ''{0}'', and no local copy of the script exists on the machine. Reason: {1}' -f $PS1URL, $($Error[0].Exception.Message))
    }
}
#endregion
#region Execution
if ($Parameters) {
    & $PS1Path @Parameters
} else {
    & $PS1Path
}
#endregion

if ( !(Test-Path $LogPath) ) {
    throw 'PowerShell Failure. A Security application seems to have restricted the execution of the PowerShell Script.'
}
if ( Test-Path $ErrorLogPath ) {
    $ErrorContent = ( Get-Content -Path $ErrorLogPath )
    throw $ErrorContent
}
Get-Content -Path $LogPath
Row 2 Function: Script Log
Add a new row by clicking the Add Row button.

A blank function will appear.
Search and select the Script Log function.

The following function will pop up on the screen:

In the script log message, simply type %output% and click the Save button.

Click the Save button at the top-right corner of the screen to save the script.

Completed Task
The Script Editor should look like this:

Output
- Script log
Changelog
2025-04-10
- Initial version of the document