NinjaRMM Deployment - [Windows]
Summary
This script deploys the NinjaRMMAgent to Windows-supported OS, based on the article provided below: Agent Installation Tokenization. It depends on the Authorization token, which will be kept in the company or site custom fields.
Sample Run
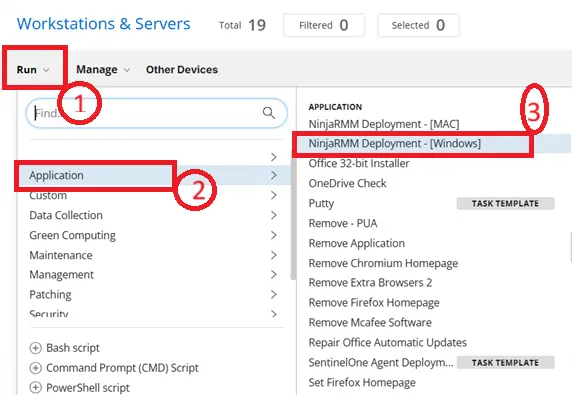
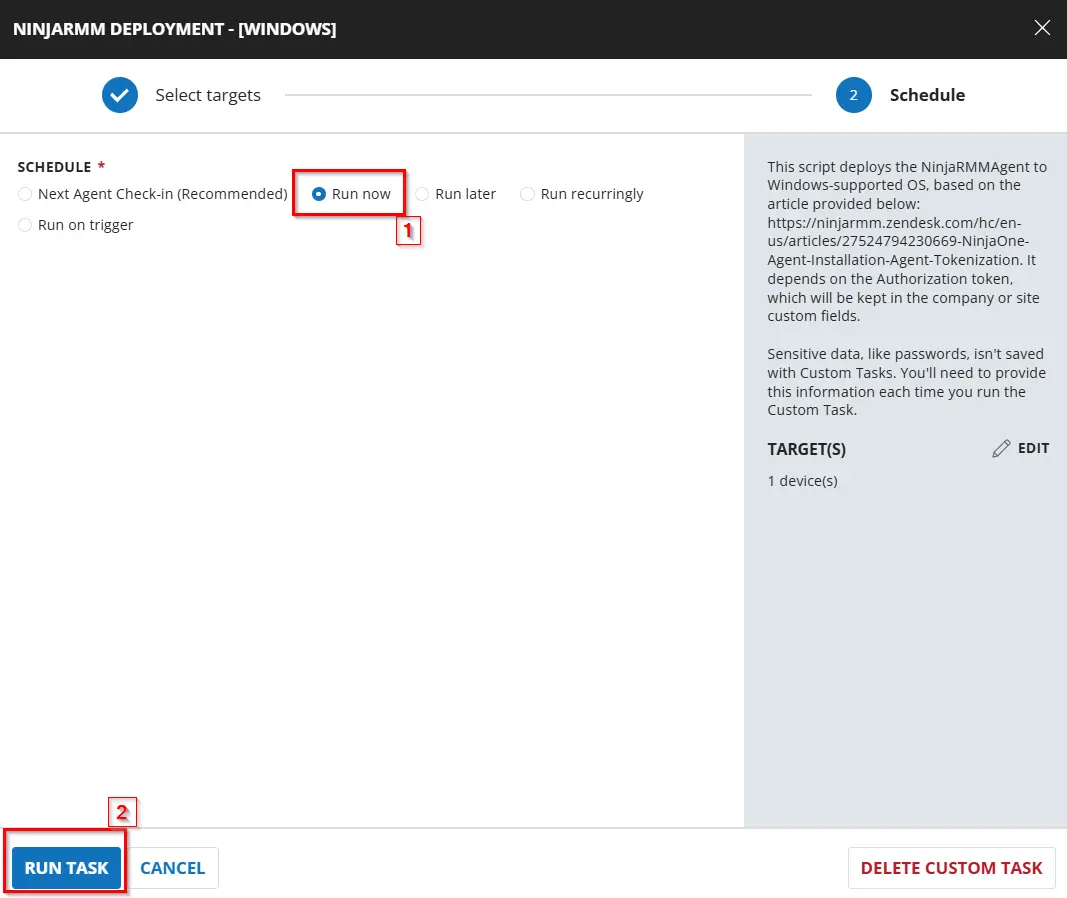
Dependencies
CW RMM - Ninja Migration Custom fields
Solution - CW RMM to Ninja Migration
Task Creation
Script Details
Step 1
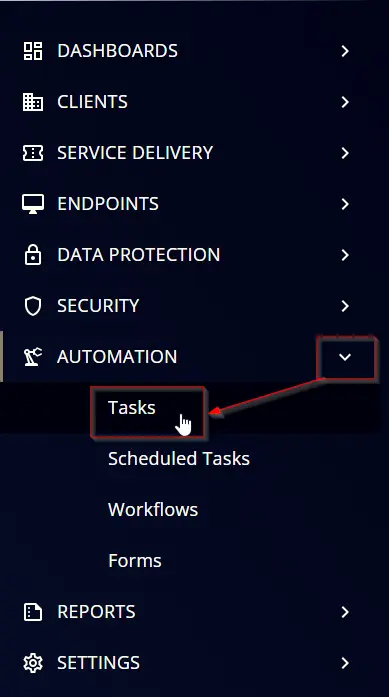
Navigate to Automation ➞ Tasks
Step 2
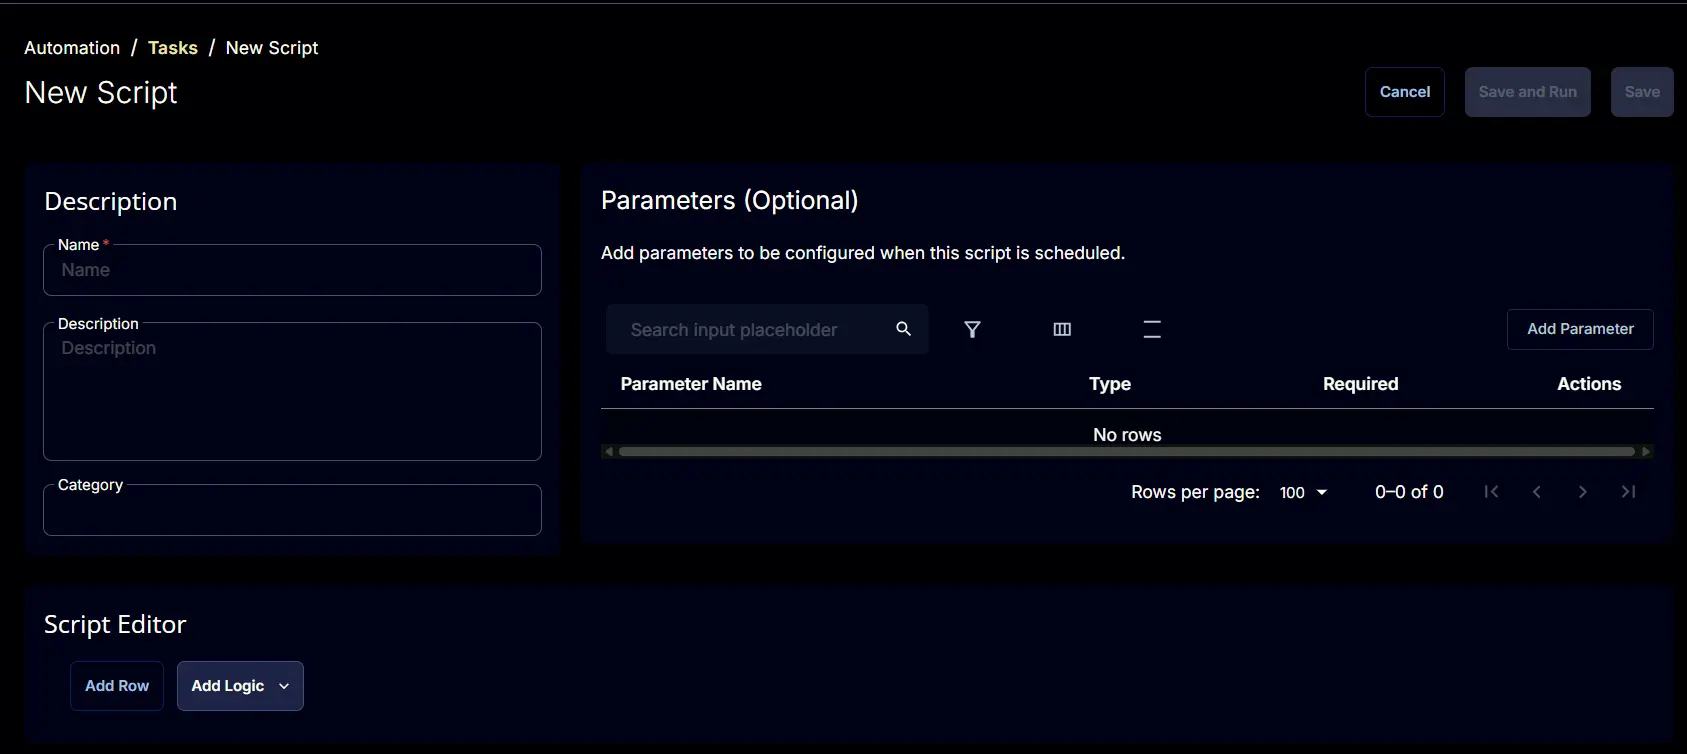
Create a new Script Editor style task by choosing the Script Editor option from the Add dropdown menu

The New Script page will appear on clicking the Script Editor button:
Step 3
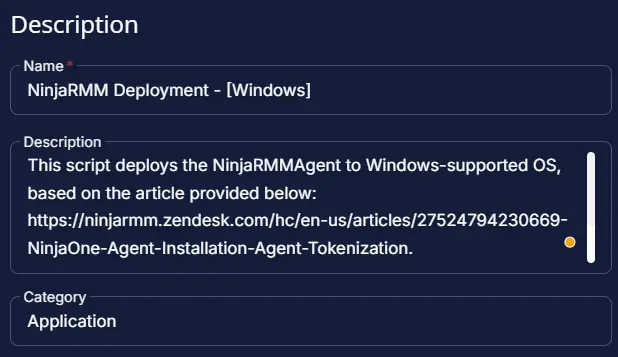
Name: NinjaRMM Deployment - [Windows]
Description: This script deploys the NinjaRMMAgent to Windows-supported OS, based on the article provided below: https://ninjarmm.zendesk.com/hc/en-us/articles/27524794230669-NinjaOne-Agent-Installation-Agent-Tokenization. It depends on the Authorization token, which will be kept in the company or site custom fields.
Category: Application
Script Editor
Click the Add Row button in the Script Editor section to start creating the script

A blank function will appear:

Note: Limit all the function to Windows machines.

Row 1 Function: Pre-defined Variable
Select the Pre-defined Variable and provide the details and click on Save.
Variable: Deployment
Custom Field: Ninja Deployment Enable
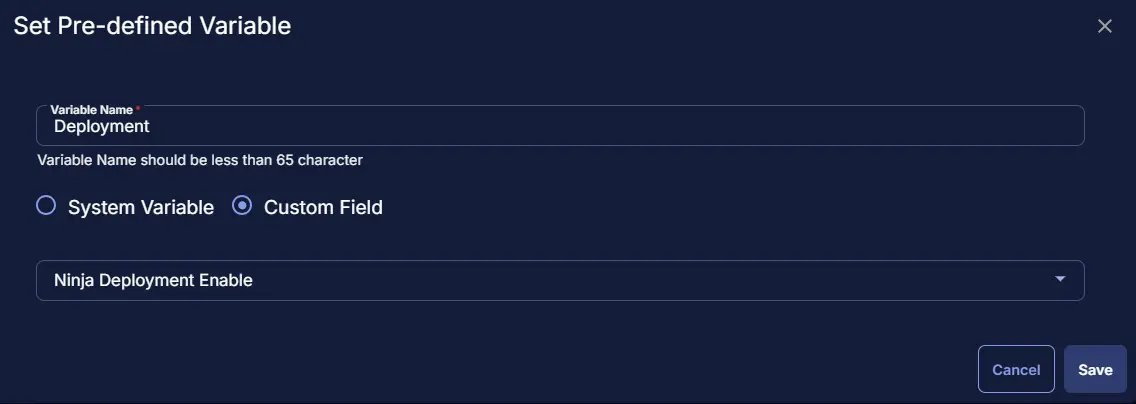
After clicking on Save the Pre-defined will show data as:

Row 2 Function: Pre-defined Variable
Select the Pre-defined Variable and provide the details and click on Save.
Make sure to select the Ninja Deployment Exclude site level custom field.
Variable: DeploymentExL
Custom Field: Ninja Deployment Exclude
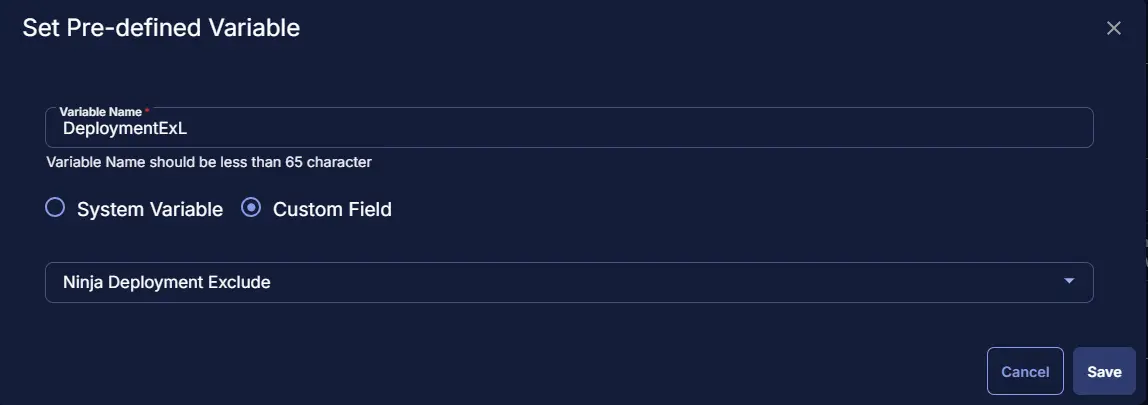
After clicking on Save the Pre-defined will show data as:

Row 3 Function: Pre-defined Variable
Select the Pre-defined Variable and provide the details and click on Save.
Make sure to select the Ninja Deployment Exclude endpoint level custom field.
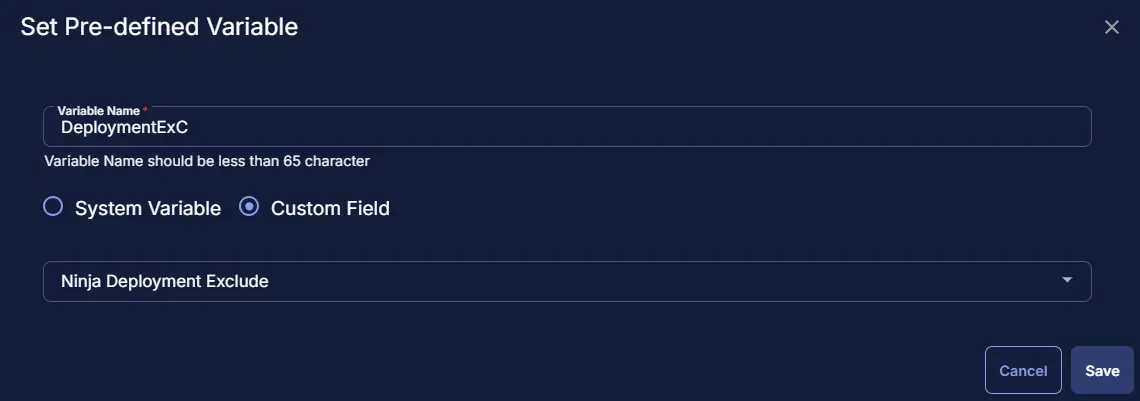
Variable: DeploymentExC
Custom Field: Ninja Deployment Exclude
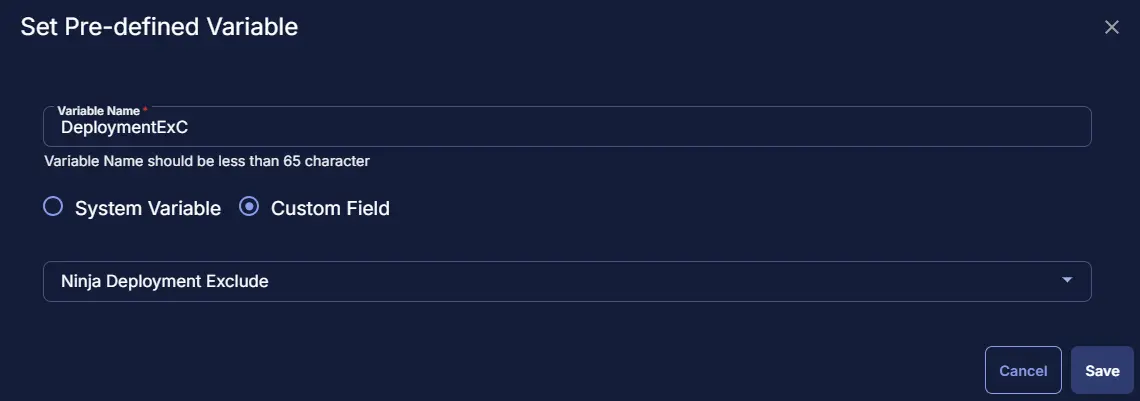
After clicking on Save the Pre-defined will show data as:
Row 4 Function: Pre-defined Variable
Select the Pre-defined Variable and provide the details and click on Save.
Variable: OrgID
Custom Field: Ninja_Org_ID

After clicking on Save the Pre-defined will show data as:

Row 5 Function: Pre-defined Variable
Select the Pre-defined Variable and provide the details and click on Save.
Variable: LocID
Custom Field: Ninja_Site_ID

After clicking on Save the Pre-defined will show data as:

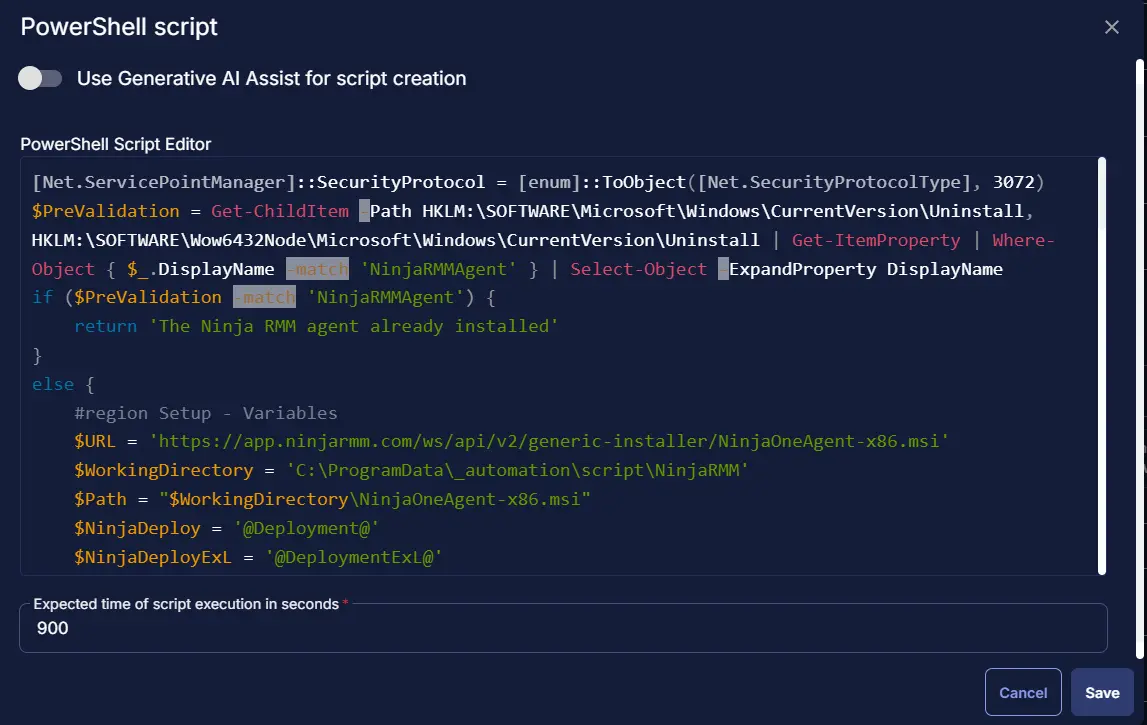
Row 6 Function: PowerShell Script
Search and select the PowerShell Script function.


The following function will pop up on the screen:

Paste in the following PowerShell script and set the Expected time of script execution in seconds to 900 seconds. Click the Save button.
Row 7 Logic: If/Then


Row 7a Condition: Output Contains
In the IF part, enter An error occurred in the right box of the "Output Contains" part.

Row 7b Function: Set Custom Field
Add a new row in the IF part by clicking the Add Row button.

Search and select the Set Custom Field function.

Search and select Ninja Deployment Result in the Search Custom Field field, set Failed in the Value field, and click the Save button.


Row 7c Function: Script Exit
In the IF part, add a new row by clicking on the Add row button.

In the script exit message, simply type The Ninja deployment failed. Refer to the logs: %Output%

Row 8 Function: Script Log
Add a new row by clicking the Add Row button after END IF

Search and select the Script Log function.

The following function will pop up on the screen:

In the script log message, simply type %Output% and click the Save button.

Row 9 Function: Set Custom Field
Add a new row by clicking the Add Row button.
Search and select the Set Custom Field function.
Search and select Ninja Deployment Result in the Search Custom Field field, set Success in the Value field, and click the Save button.


Save Task
Click the Save button at the top-right corner of the screen to save the script.

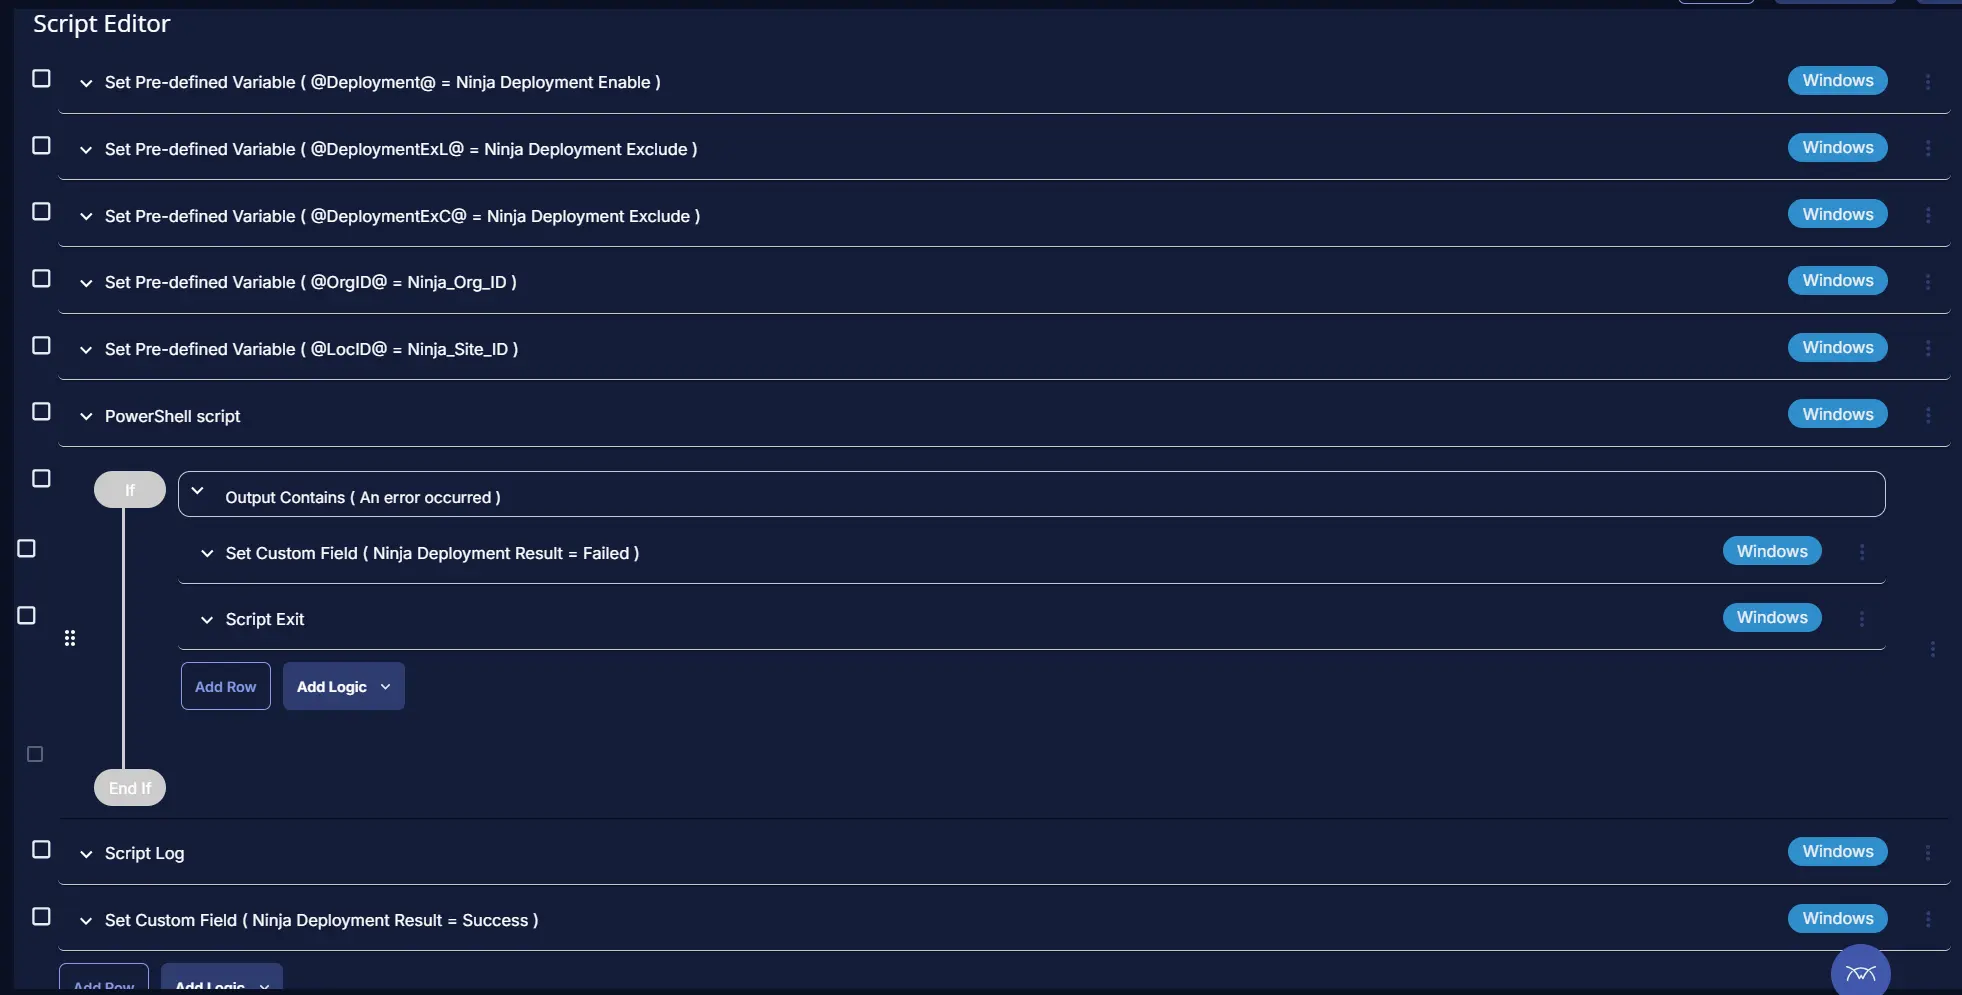
Completed Task
Deployment
This task is required to be deployed using a dynamic group.
It can be scheduled to run every 1 hour. Follow the below deployment step to schedule it.
-
Go to Automation > Tasks.
-
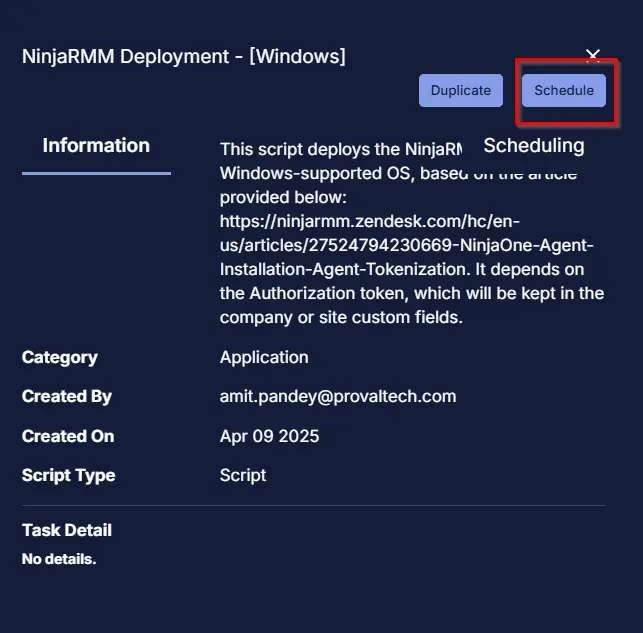
Search for
NinjaRMM Deployment - [Windows] -
Then click on Schedule
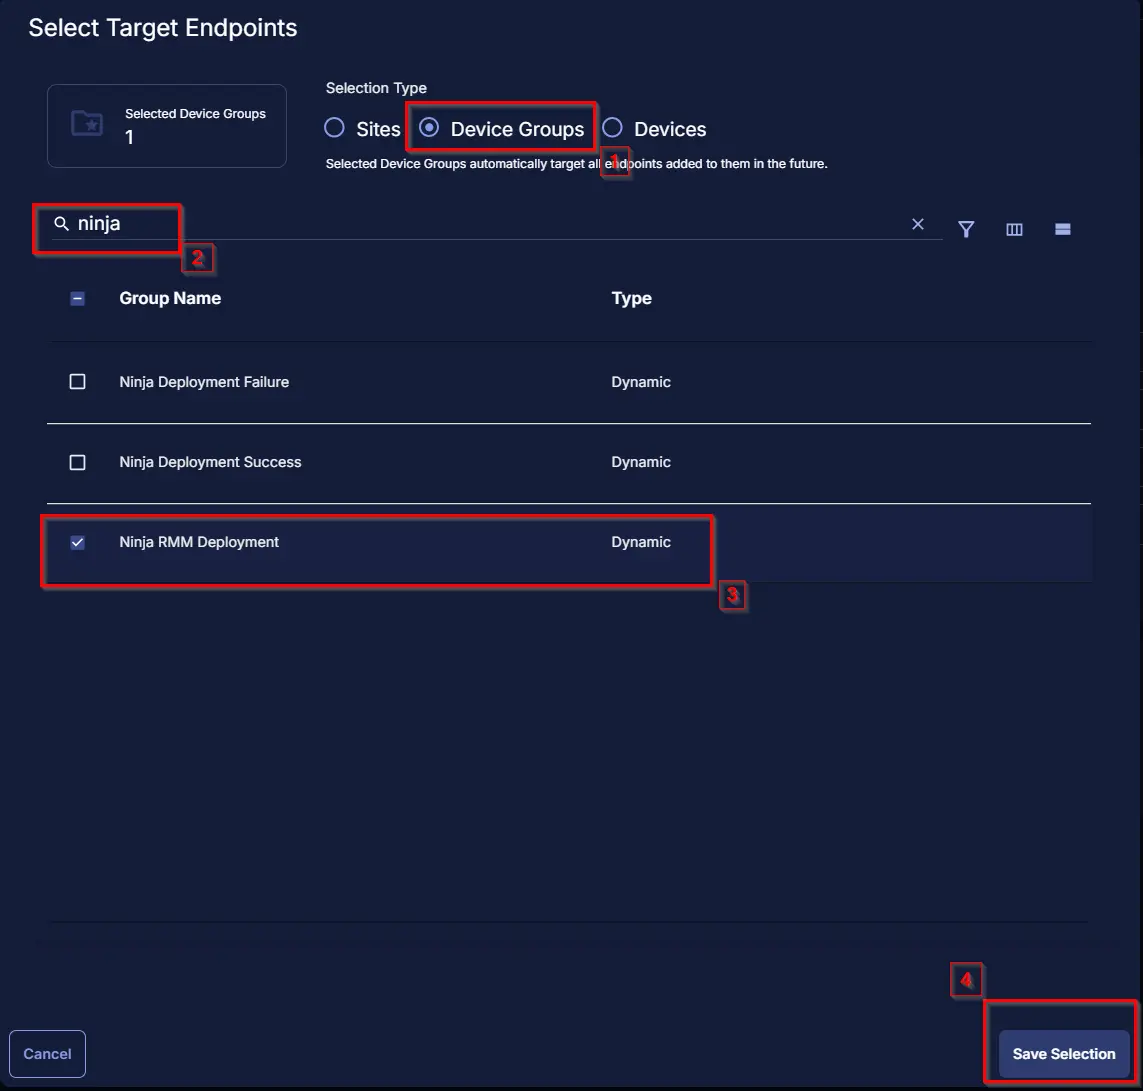
- Select the Target group Ninja RMM Deployment

- Click Device Group -> Search for Ninja -> Select
Ninja RMM Deploymentgroup and click save selection
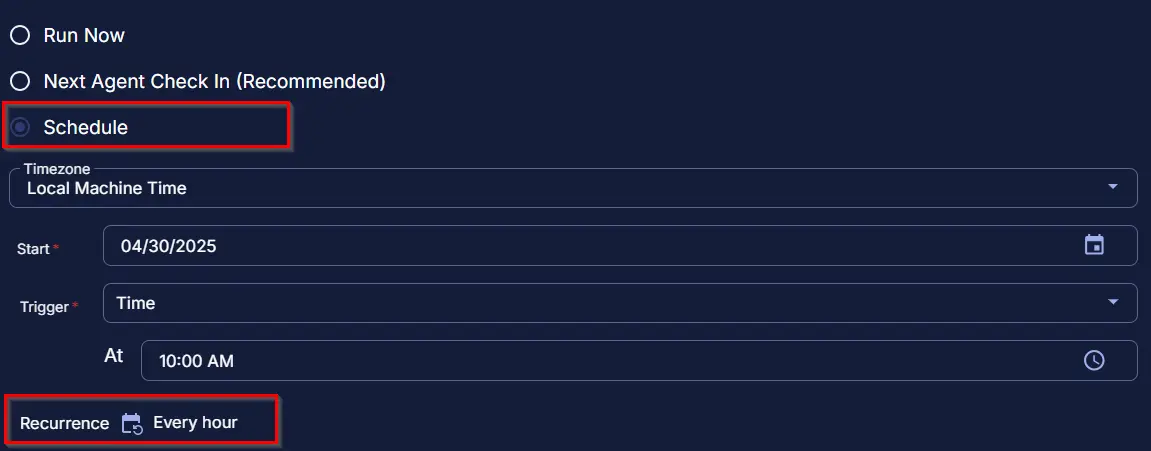
- Click on Schedule option, and set the time and click on Repeat to set it to run every hour

Output
- Custom field
- Script Log
Changelog
2025-04-30
- Initial version of the document