Out of Date CU _ Autofix Required
Summary
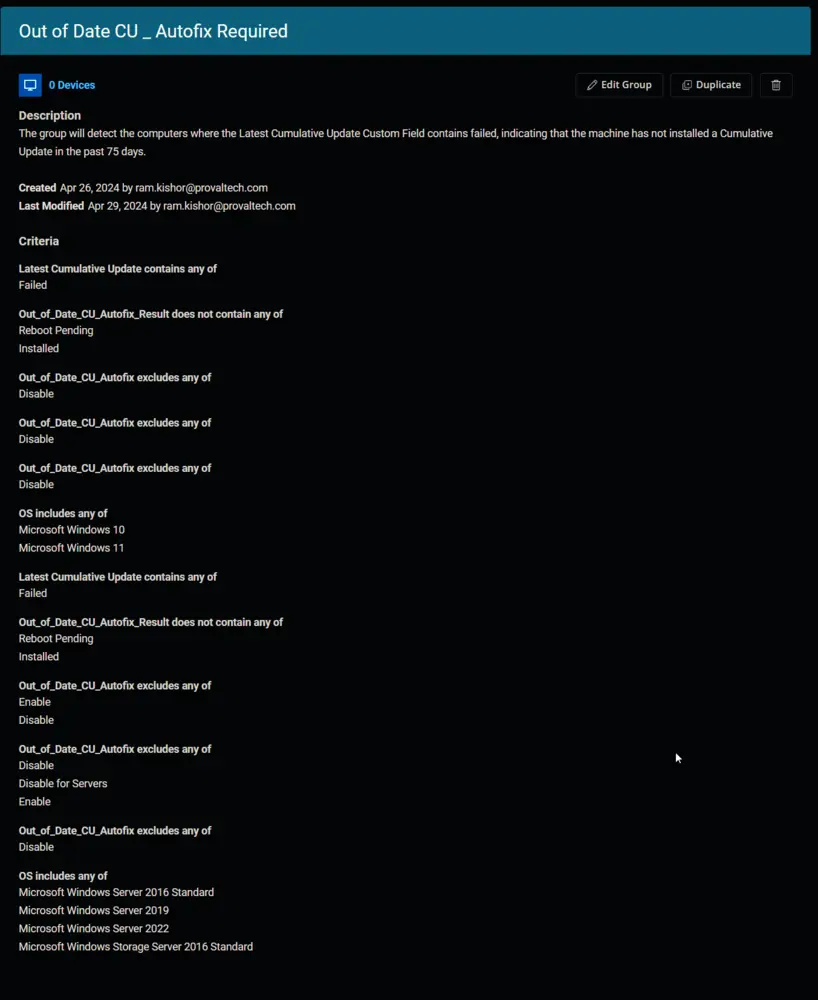
The group will detect the computers where the Latest Cumulative Update Custom Field contains "failed," indicating that the machine has not installed a Cumulative Update in the past 75 days.
Dependencies
- Solution - Autofix - Out of Date Cumulative Update
- Custom Field - Latest Cumulative Update
- Custom Field - EndPoint - Out_of_Date_CU_Autofix_Result
- Custom Field - Company - Out_of_Date_CU_Autofix
- Custom Field - Site - Out_of_Date_CU_Autofix
- Custom Field - EndPoint - Out_of_Date_CU_Autofix
Group Creation
1.
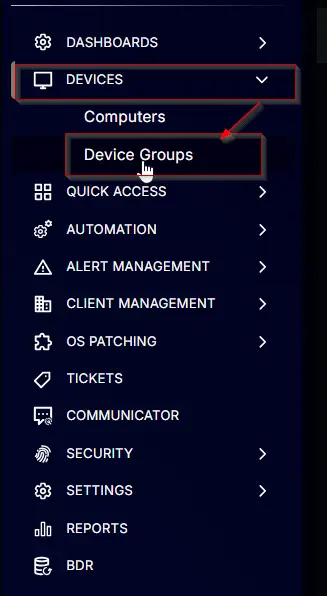
Navigate to Devices > Device Groups.
2.
Create a new dynamic group by clicking the Dynamic Group button.

This page will appear after clicking on the Dynamic Group button:

3.
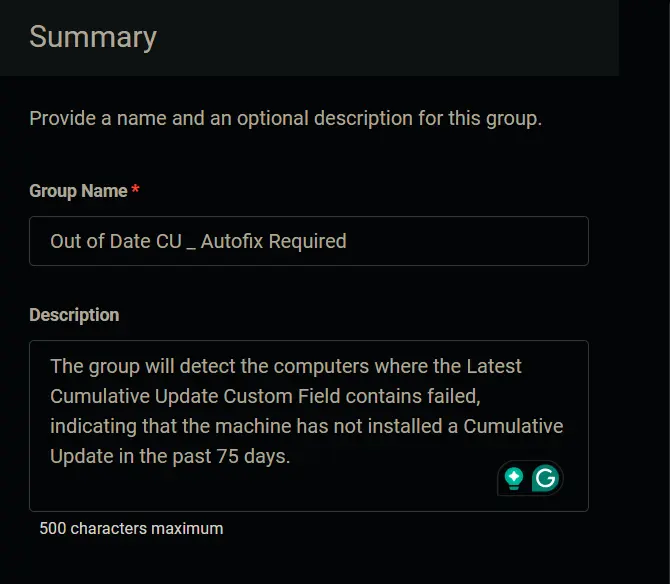
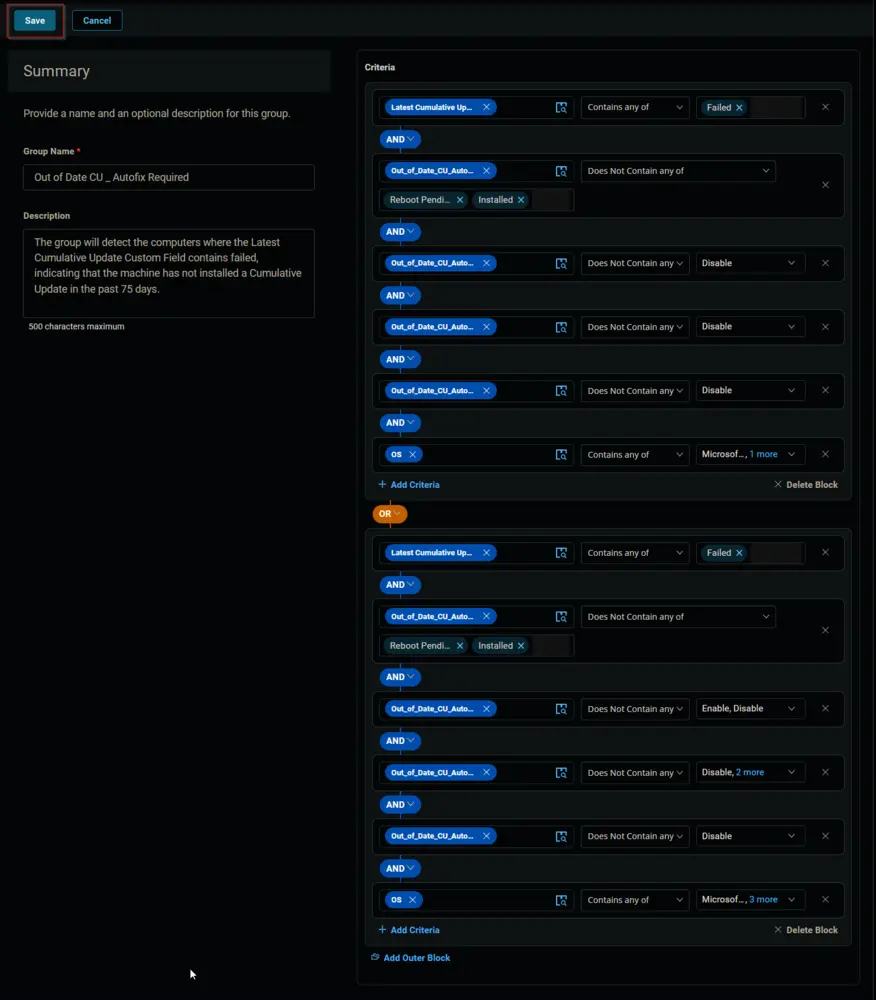
Set the group name to Out of Date CU - Autofix Required.
Description: The group will detect the computers where the Latest Cumulative Update Custom Field contains failed, indicating that the machine has not installed a Cumulative Update in the past 75 days.
4.
Click the + Add Criteria in the Criteria section of the group.

This search box will appear.

5.
Search and select the Latest Cumulative Update custom field from the search box.

Type Failed in the comparison condition and press Enter.

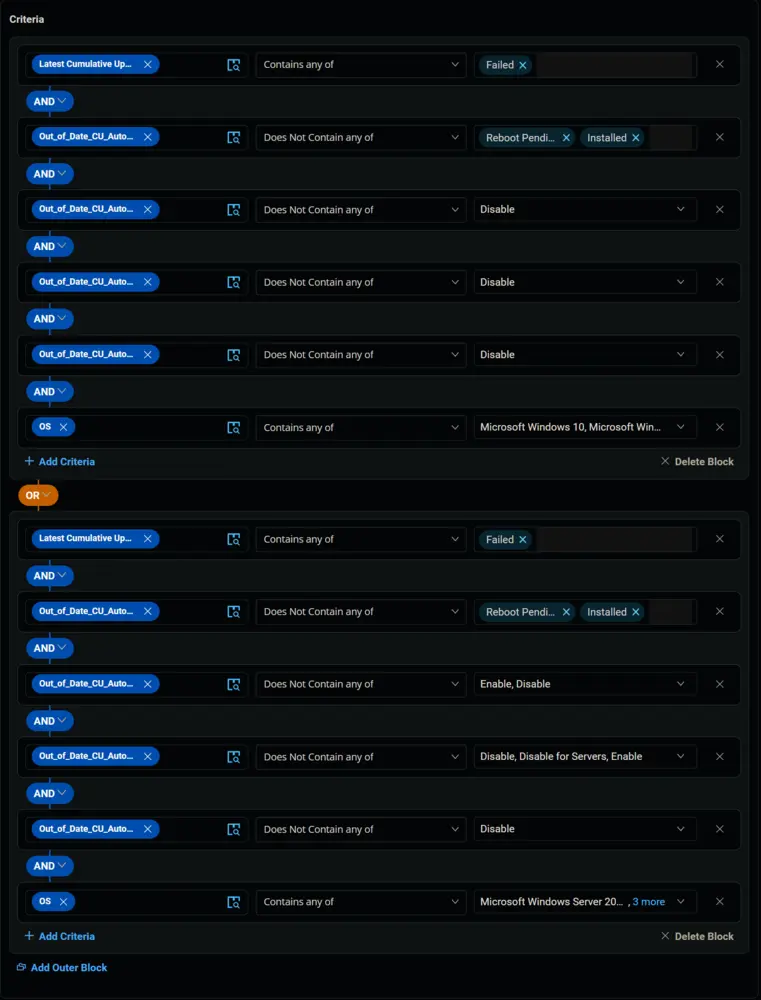
Condition: Latest Cumulative Update Contains any of Failed
6.
Click the + Add Criteria button.

A new search box will appear.

Search and select the Out_of_Date_CU_Autofix_Result custom field from the search box.

Change the comparator to Does Not Contain any of.

Type Reboot Pending and Installed in the comparison condition and press Enter.

Condition: Out_of_Date_CU_Autofix_Result Does Not Contain any of Reboot Pending, Installed
7.
Click the + Add Criteria button.

A new search box will appear.

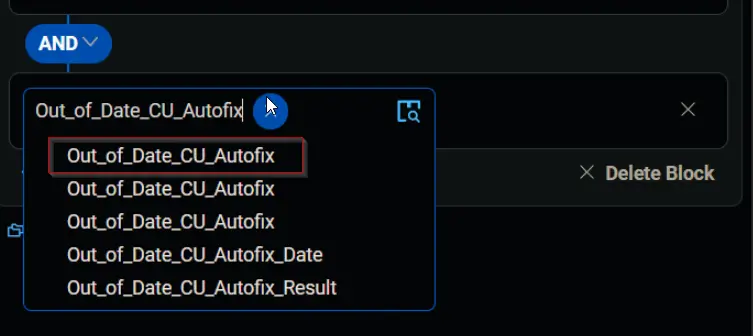
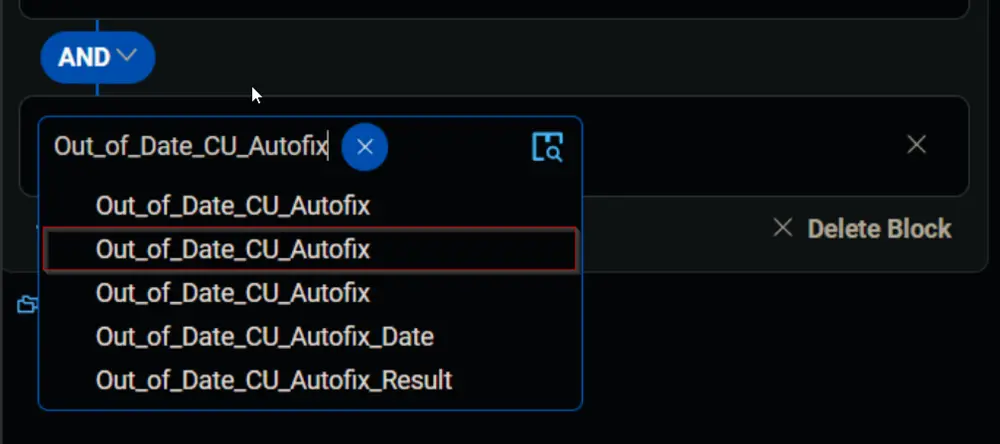
Search and select the Out_of_Date_CU_Autofix custom field from the search box. Remember, there are three different Out_of_Date_CU_Autofix custom fields, and we are going to use all three of these one after another in the conditions.
We are selecting the company level custom field in this step.
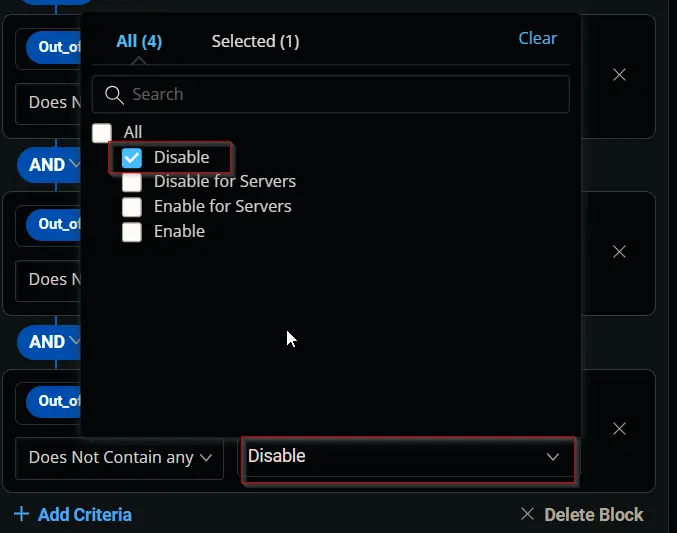
Change the comparator to Does Not Contain any of.

Select Disable in the comparison field.
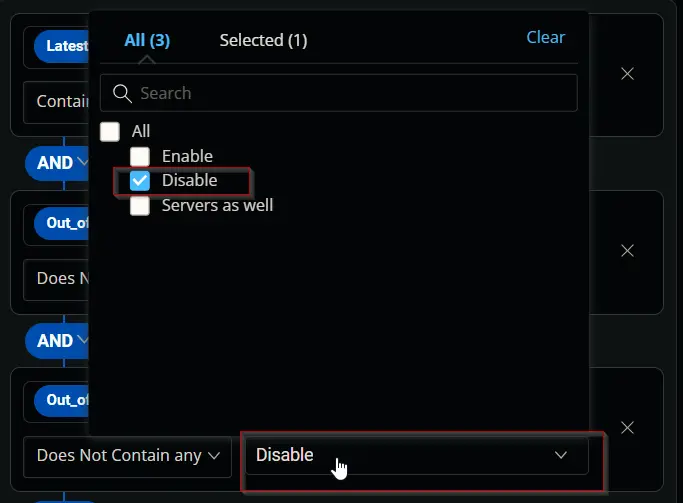
Condition: Out_of_Date_CU_Autofix Does Not Contain any of Disable
8.
Click the + Add Criteria button.

A new search box will appear.

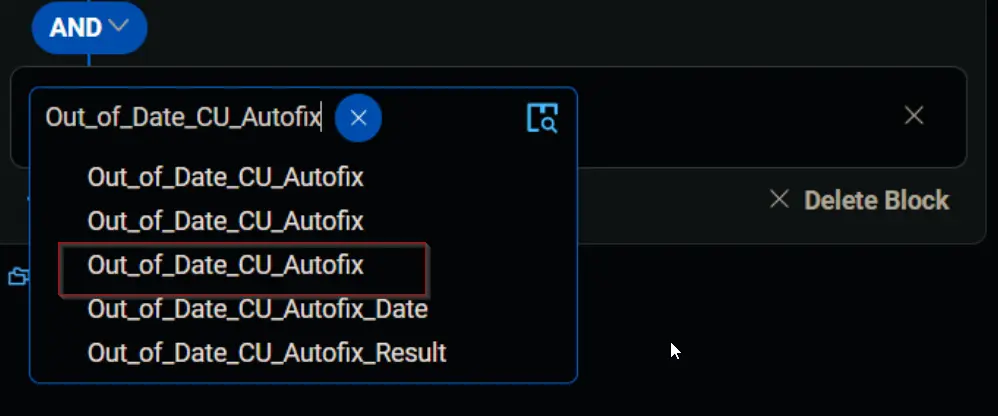
Search and select the Out_of_Date_CU_Autofix custom field from the search box. We are selecting the site level custom field in this step.
Change the comparator to Does Not Contain any of.
Select Disable in the comparison field.
Condition: Out_of_Date_CU_Autofix Does Not Contain any of Disable
9.
Click the + Add Criteria button.

A new search box will appear.

Search and select the Out_of_Date_CU_Autofix custom field from the search box. We are selecting the Endpoint level custom field in this step.
Change the comparator to Does Not Contain any of.
Select Disable in the comparison field.

Condition: Out_of_Date_CU_Autofix Does Not Contain any of Disable
10.
Click the + Add Criteria button.
A new search box will appear.
Search and select the OS criteria.
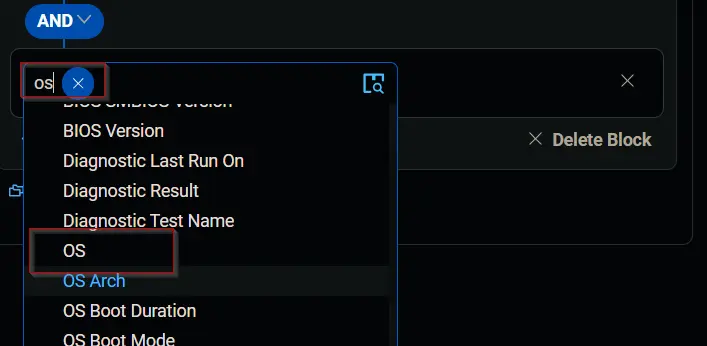
Leave the comparator set to Contain any of.

Select Microsoft Windows, 10, and 11 in the comparison field.
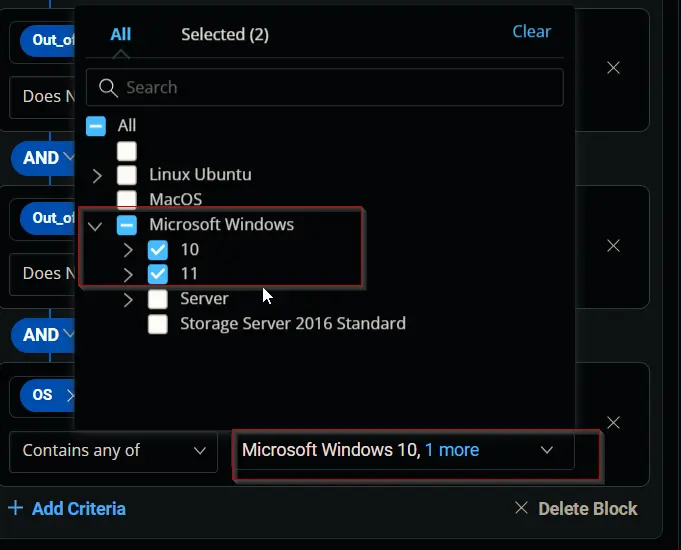
Condition: OS Contains any of Microsoft Windows 10, Microsoft Windows 11
11.
From this step onward, we will work in an Outer Block.
Click the Add Outer Block button to create a new block.

A new block will appear.

Change the logical operator to OR from AND.

12.
Click the + Add Criteria in the newly added Outer Block.

This search box will appear.

Search and select the Latest Cumulative Update custom field from the search box.

Type Failed in the comparison condition and press Enter.

Condition: Latest Cumulative Update Contains any of Failed
13.
Click the + Add Criteria button.

A new search box will appear.
Search and select the Out_of_Date_CU_Autofix_Result custom field from the search box.
Change the comparator to Does Not Contain any of.
Type Reboot Pending and Installed in the comparison condition and press Enter.
Condition: Out_of_Date_CU_Autofix_Result Does Not Contain any of Reboot Pending, Installed
14.
Click the + Add Criteria button.
A new search box will appear.
Search and select the Out_of_Date_CU_Autofix custom field from the search box.
We are selecting the company level custom field in this step.
Change the comparator to Does Not Contain any of.
Select Disable and Enable in the comparison field.
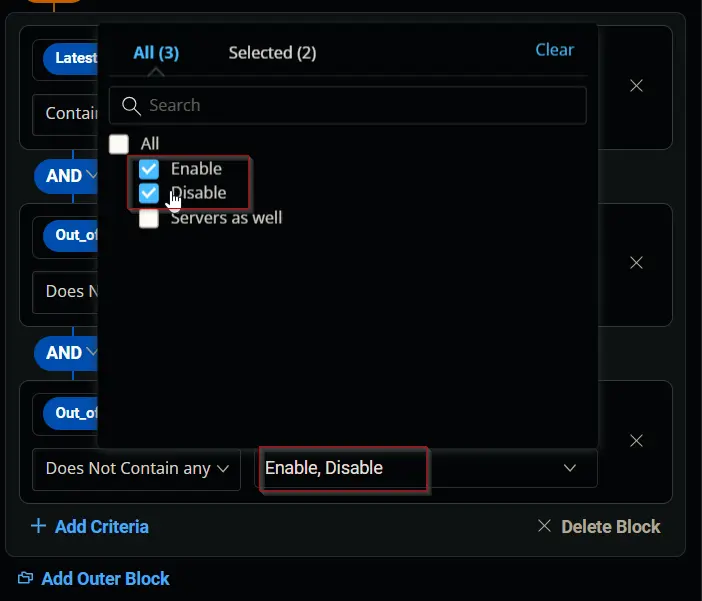
Condition: Out_of_Date_CU_Autofix Does Not Contain any of Disable, Enable
15.
Click the + Add Criteria button.

A new search box will appear.

Search and select the Out_of_Date_CU_Autofix custom field from the search box.
We are selecting the site level custom field in this step.
Change the comparator to Does Not Contain any of.
Select Disable, Disable for Servers, and Enable in the comparison field.
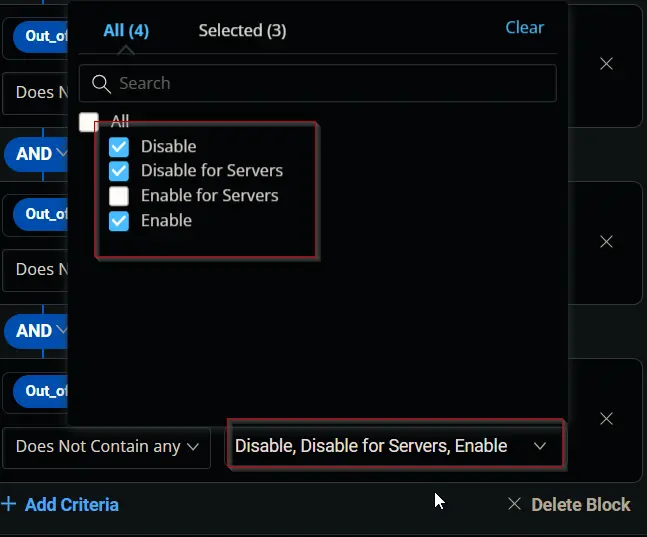
Condition: Out_of_Date_CU_Autofix Does Not Contain any of Disable, Disable for Servers, Enable
16.
Click the + Add Criteria button.

A new search box will appear.

Search and select the Out_of_Date_CU_Autofix custom field from the search box.
We are selecting the Endpoint level custom field in this step.
Change the comparator to Does Not Contain any of.
Select Disable in the comparison field.
Condition: Out_of_Date_CU_Autofix Does Not Contain any of Disable
17.
Click the + Add Criteria button.
A new search box will appear.
Search and select the OS criteria.
Leave the comparator set to Contain any of.
Select Microsoft Windows, Server, 2016, 2019, and 2022 in the comparison field.
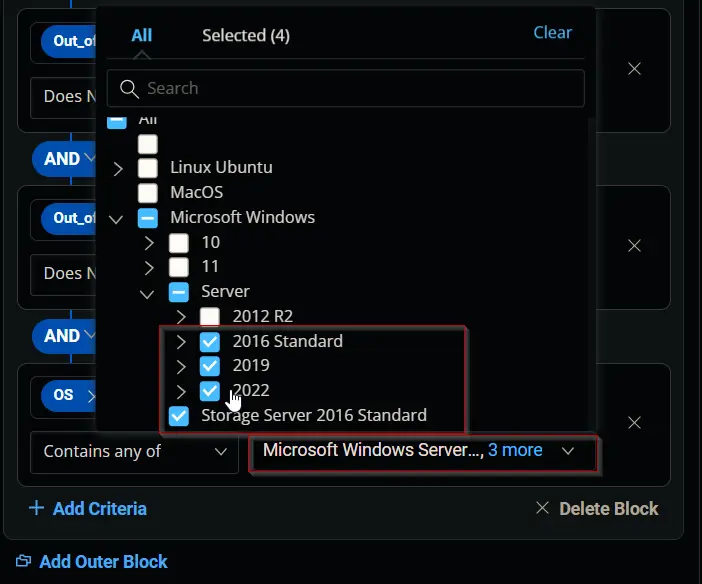
Condition: OS Contains any of Microsoft Windows Server 2016, Microsoft Windows Server 2019, Microsoft Windows Server 2022
18.
Click the Save button to save/create the group.
Completed Group
Changelog
2025-04-10
- Initial version of the document