Get - .Net Framework Version
Summary
Runs the Get - .Net Framework Version [CF] automation weekly against cPVAL Windows Machines group to get .Net Framework Version and updates the cPVALnetFrameWorkVersion custom field with the retrieved information.
Dependencies
Automation - Get - .Net Framework Version [CF]
Group - cPVAL Windows Servers
Custom Field - cPVAL .NET FrameWork Version
Details
| Name | Description | Allow Groups | Repeats | Recur every | Start At | Ends | Targets | Automations |
|---|---|---|---|---|---|---|---|---|
| Get - .Net Framework Version | Retrieves .net Framework Version and stores it in cPVALnetFrameWorkVersion custom field. | True | Weekly | 1 week | Current Time | Never | cPVAL Windows Machines Group | Get - .Net Framework Version [CF] |
Task Creation
Step 1
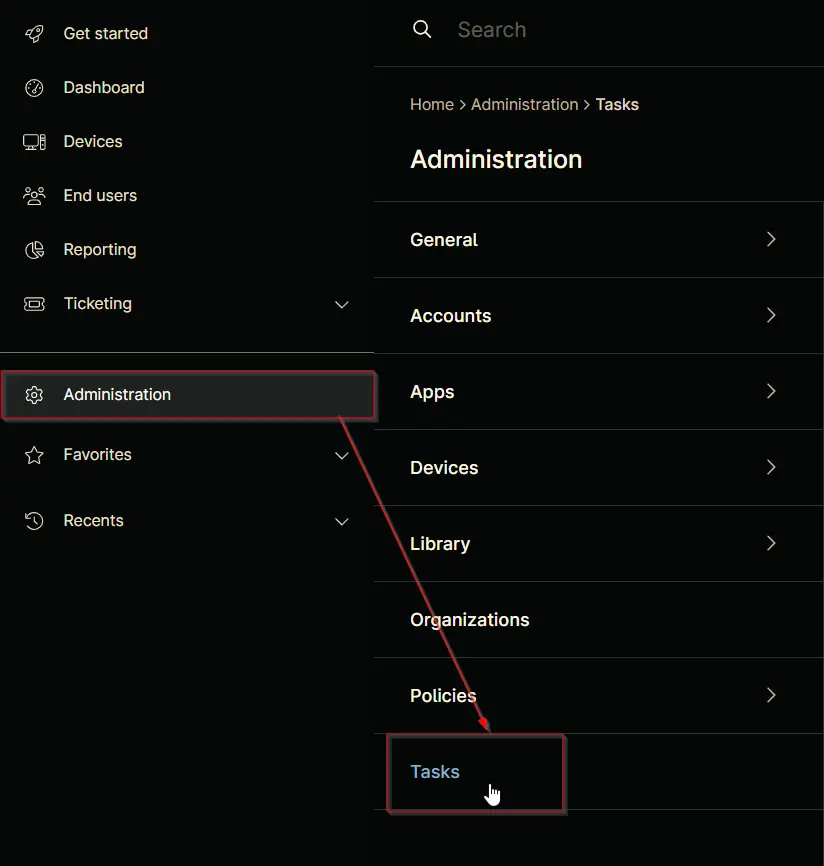
Navigate to Administration > Tasks
Step 2
Locate the New Task button on the right-hand side of the screen, click on it.

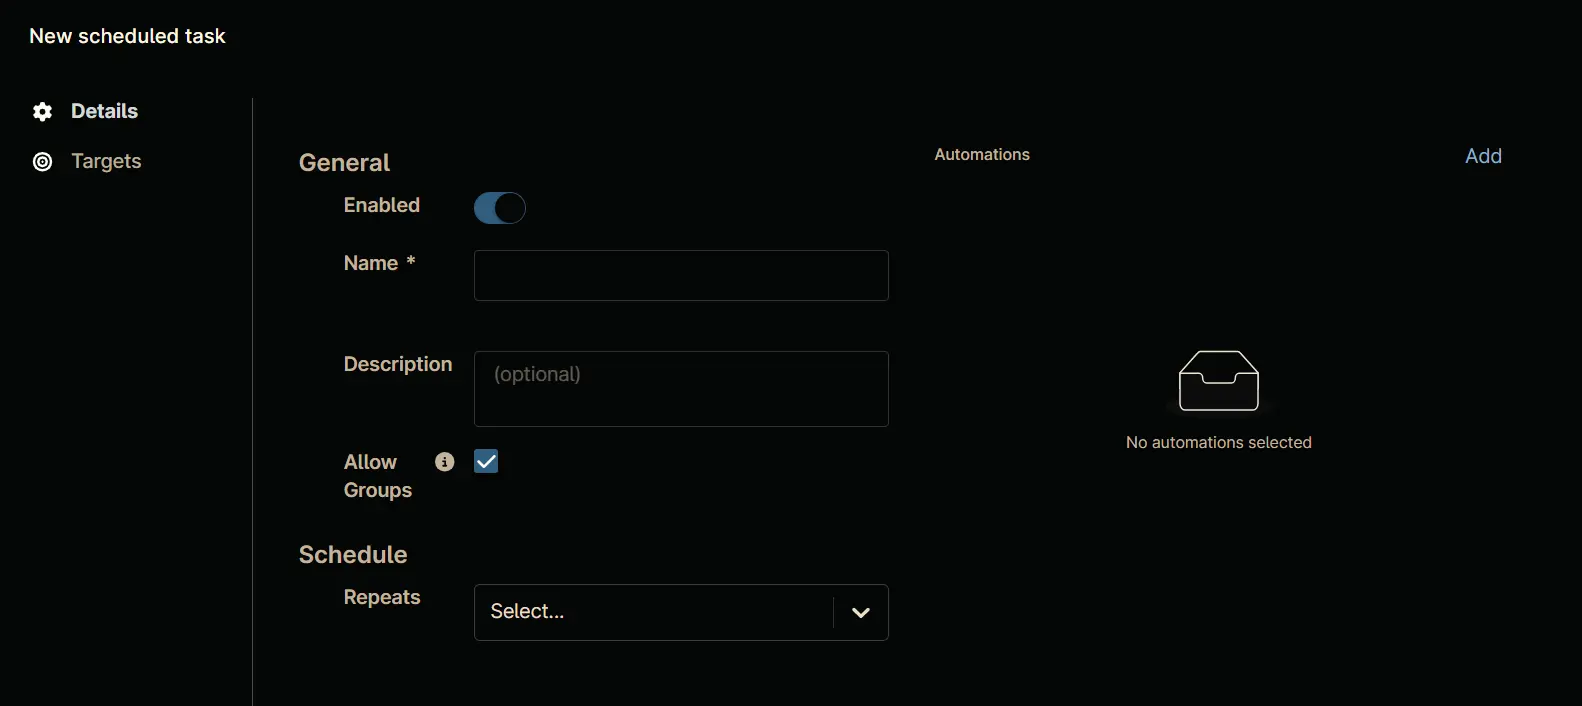
The New Scheduled Task window will appear on the screen.
Step 3
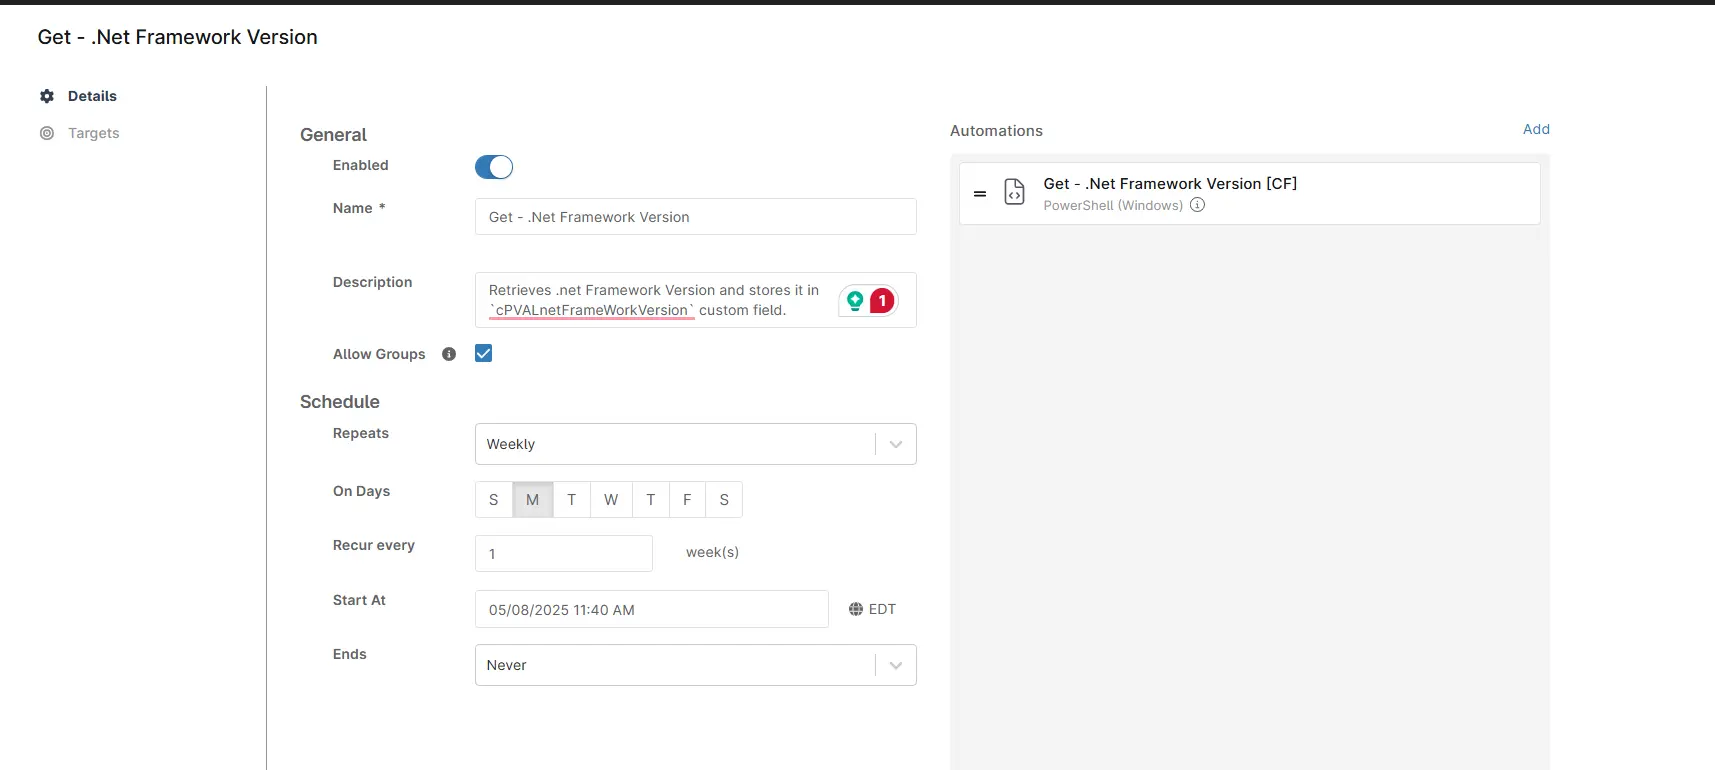
Set the following details in the General section.
Enabled:TrueName:Get - .Net Framework VersionDescription:Retrieves .net Framework Version and stores it in 'cPVALnetFrameWorkVersion' custom field.Allow Groups:True

Step 4
Set the following details in the Schedule section:
Repeats:WeeklyRecur every:1 WeekStart At:<Current Time>Ends:Never

Step 5
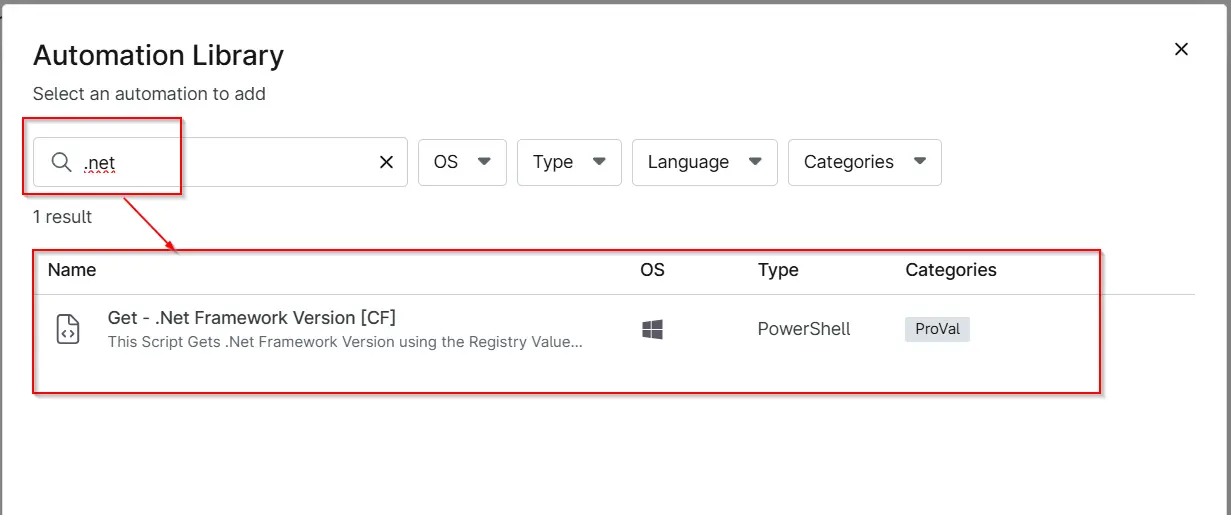
Click the Add button in the Automations section to add the Get - .Net Framework Version [CF] automation.

Search and select the Get - .Net Framework Version [CF] automation in the Automation Library, that will appear after clicking the Add button.
Step 6
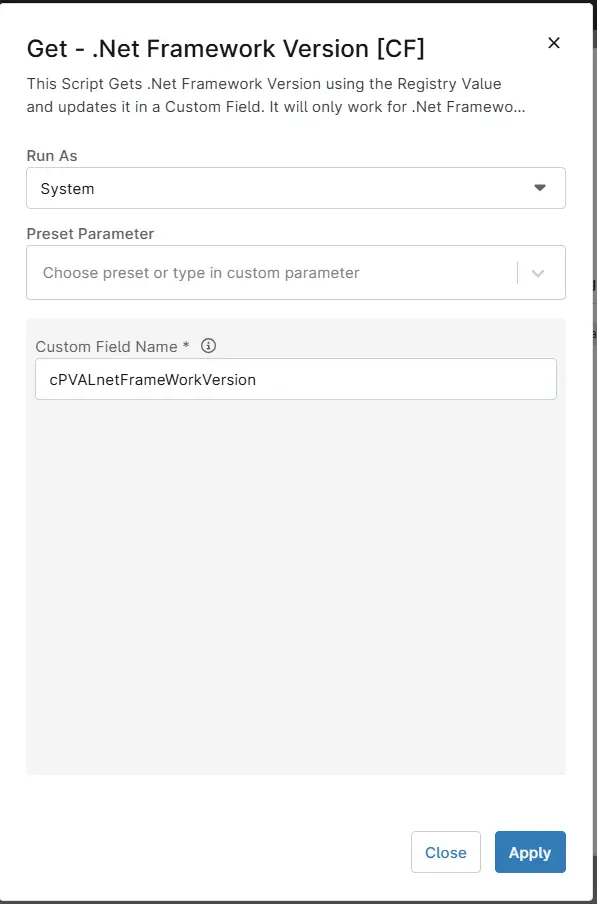
Click the Apply button on the script's parameter window without making any changes.
Step 7
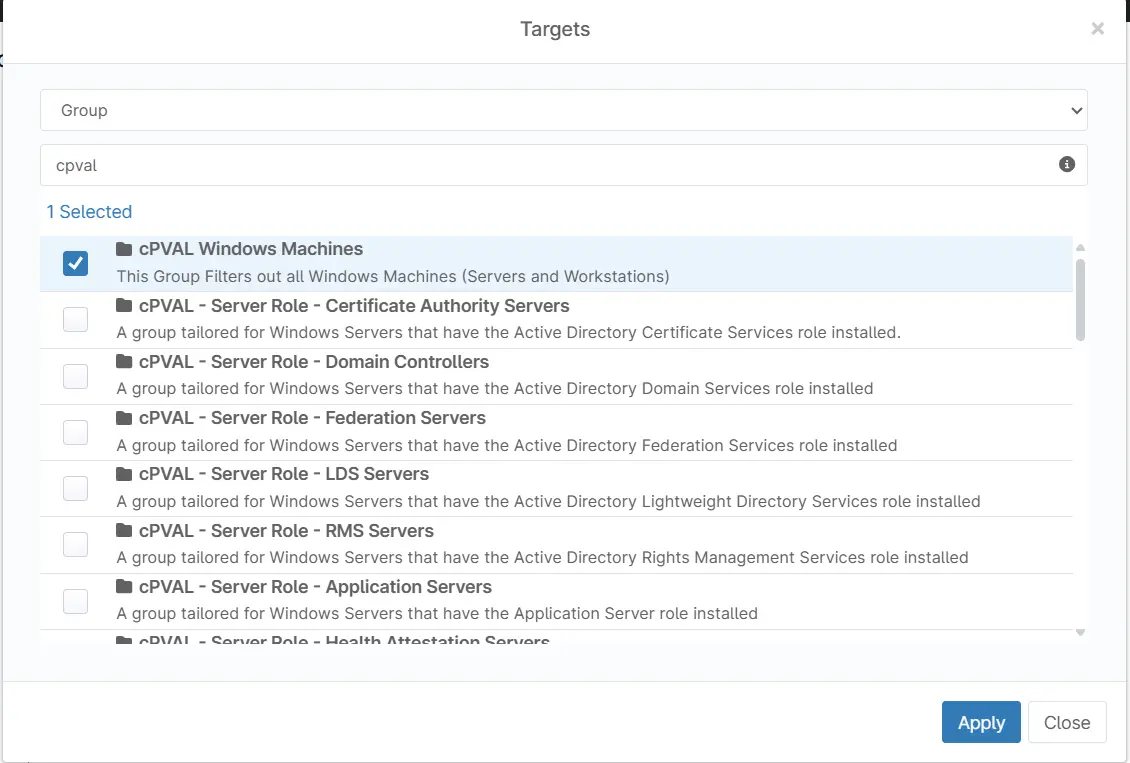
- Navigate to the
Targetssection by clicking theTargetsbutton. - Click the
Addbutton located on the right-hand side of the screen. - In the
Targetswindow that appears, select theGroupoption from the dropdown menu. - Search for cPVAL and select the
cPVAL Windows Machinesgroup. - Click the
Applybutton at the bottom of the screen to save the selected target.
Completed Task
Details Section
The Details section will display the configured task details.
Targets Section
The Targets section will show the selected target group.

Saving the Task
Click the Save button at the top of the screen to save the scheduled task.
You will be prompted to verify your MFA code after clicking the Save button. Enter your MFA code and click the Continue button to finalize the task creation.

Changelog
2025-05-14
- Initial version of the document