Deploy Vulscan Discovery Agent - Macintosh
Summary
Triggers the Deploy Vulscan Discovery Agent - Macintosh automation on Macintosh machines where deployment is enabled.
Details
Name: Deploy Vulscan Discovery Agent - Macintosh
Description: Triggers the auto-deployment script for the Vulscan Discovery Agent on Macintosh machines where deployment is enabled.
Recommended Agent Policies: It is advised to configure this compound policy within the following default agent policies:
Mac Server [Default]Mac [Default]
Dependencies
- cPVAL Vulscan Discovery Agent Deployment
- cPVAL Vulscan Discovery Agent - Exclude
- Deploy Vulscan Discovery Agent - Macintosh
Compound Condition Creation
Compound conditions can be configured within an Agent Policy. This document provides an example using the default Mac [Default] policy for demonstration purposes.
Navigate to Administration > Policies > Agent Policies.
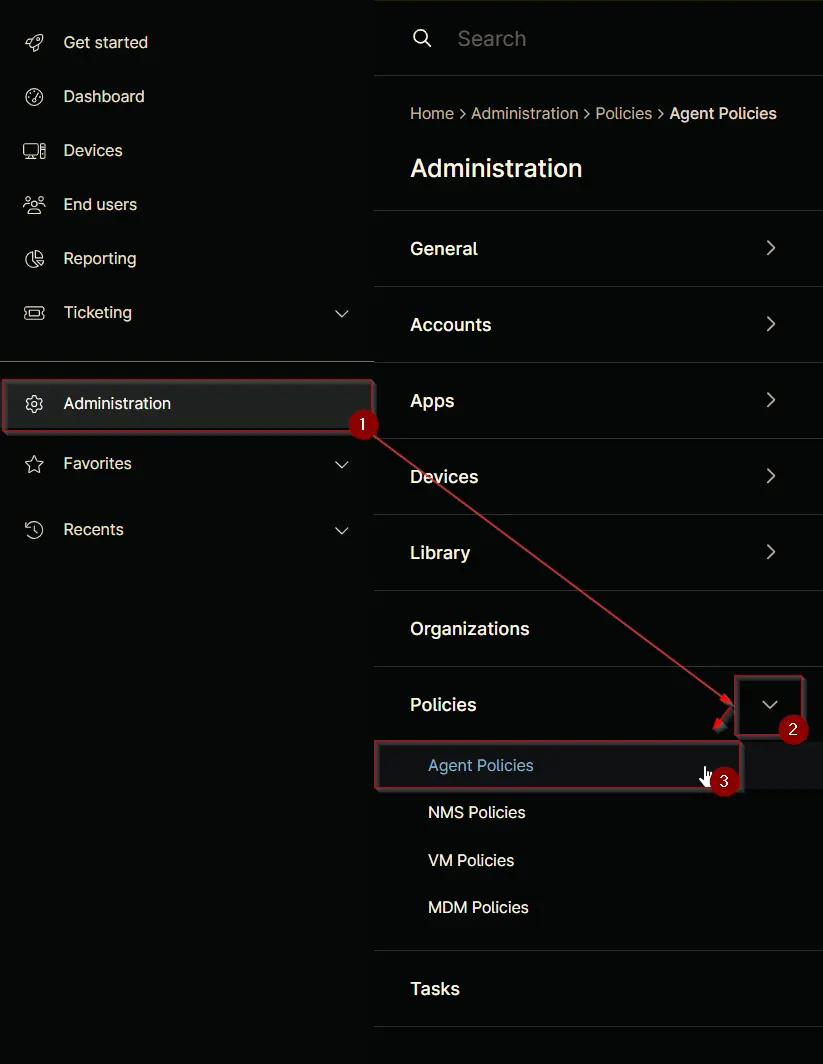
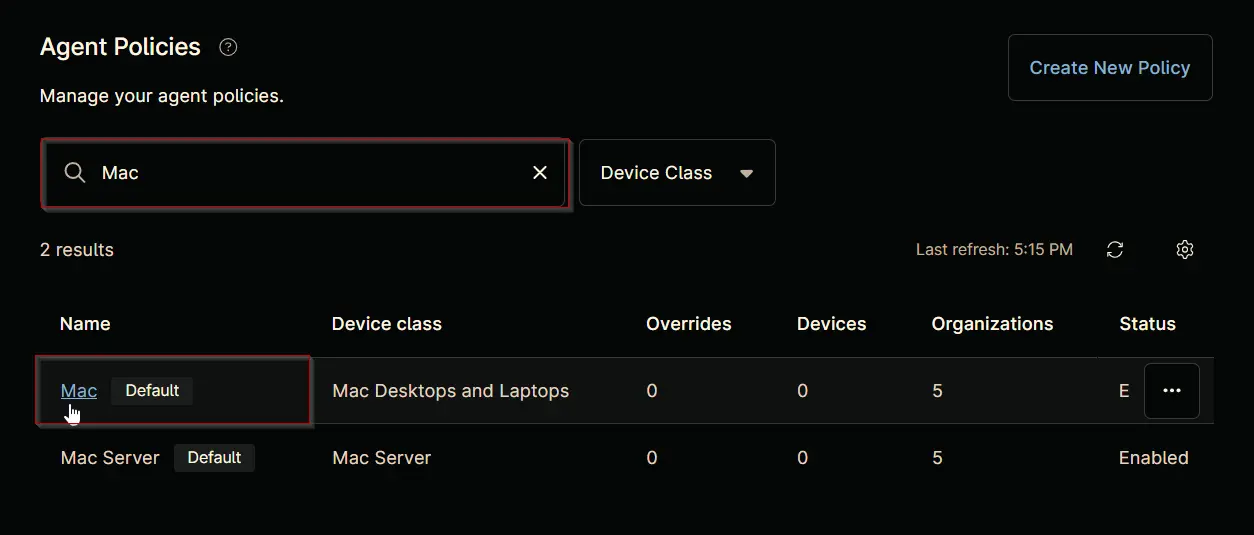
Search for Mac and select the default Mac [Default] policy.
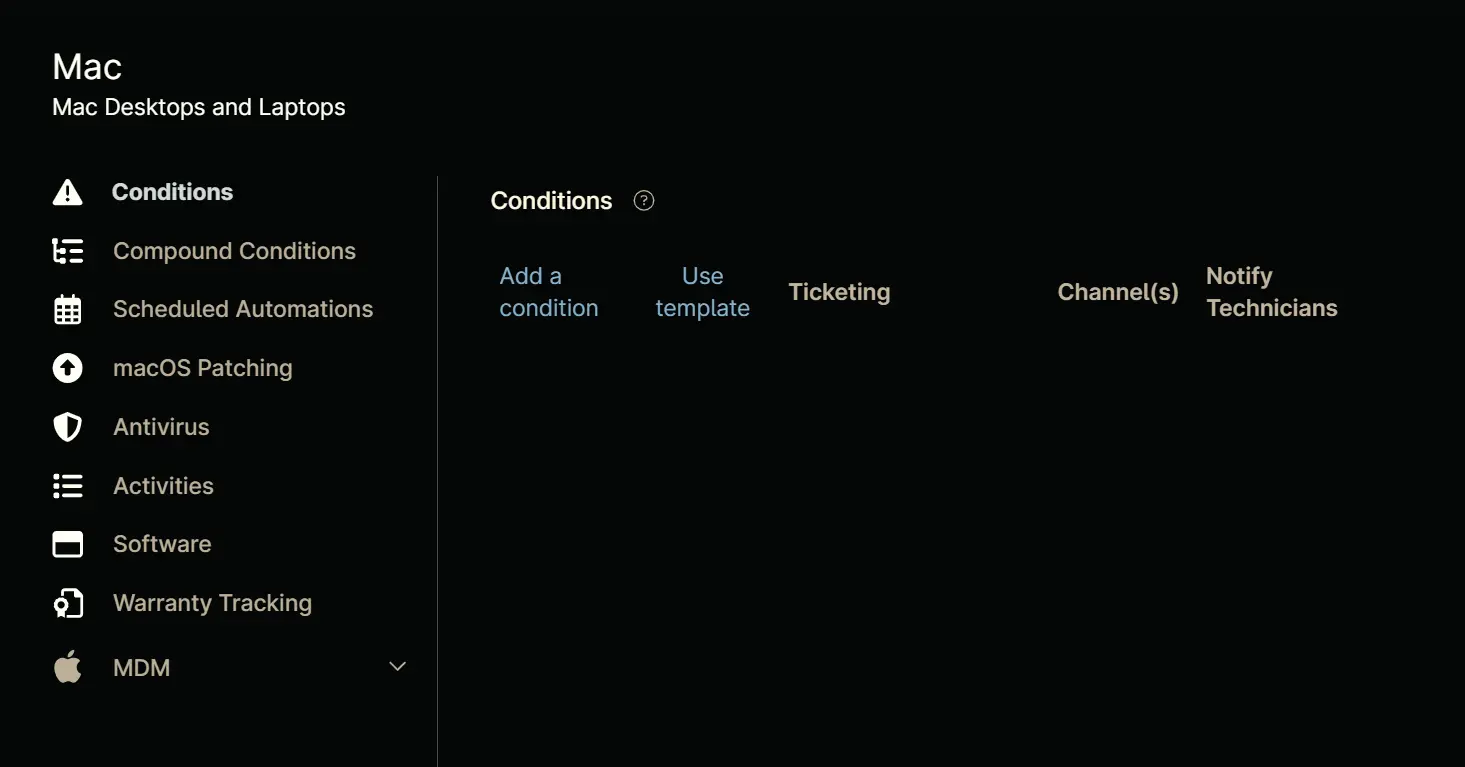
This will navigate you to the policy's landing page, which is the Conditions section. Note that conditions may vary across different policies and environments. The provided screenshot is for demonstration purposes only.
Navigate to the Compound Conditions section. Note that existing compound conditions may vary across different policies and environments. The provided screenshot is for demonstration purposes only.
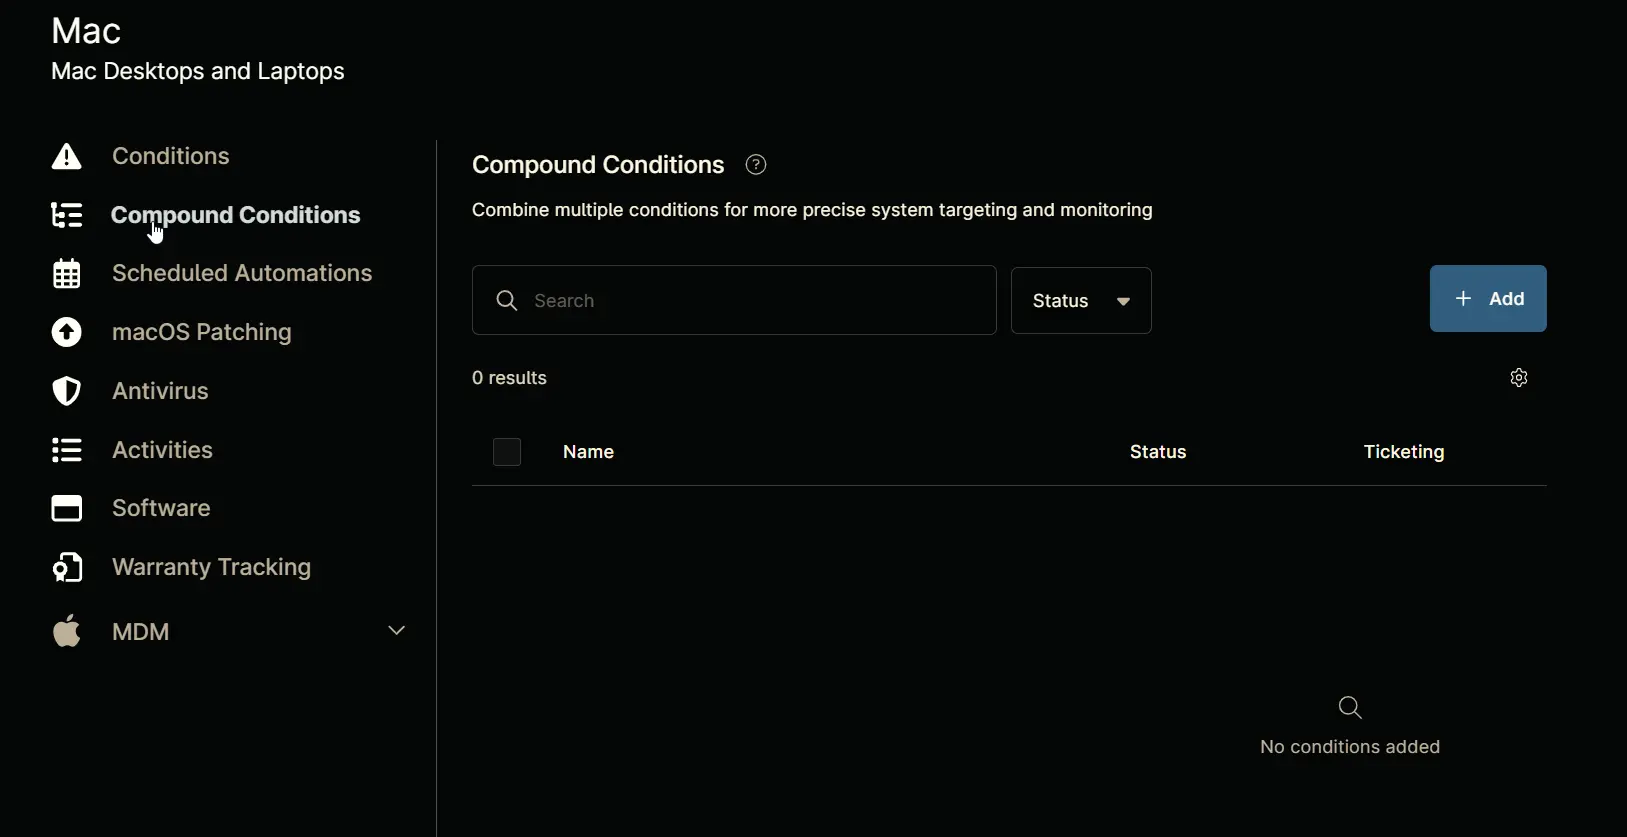
Click the + Add button to add a compound condition.

Clicking the + Add button opens the compound condition creation window.
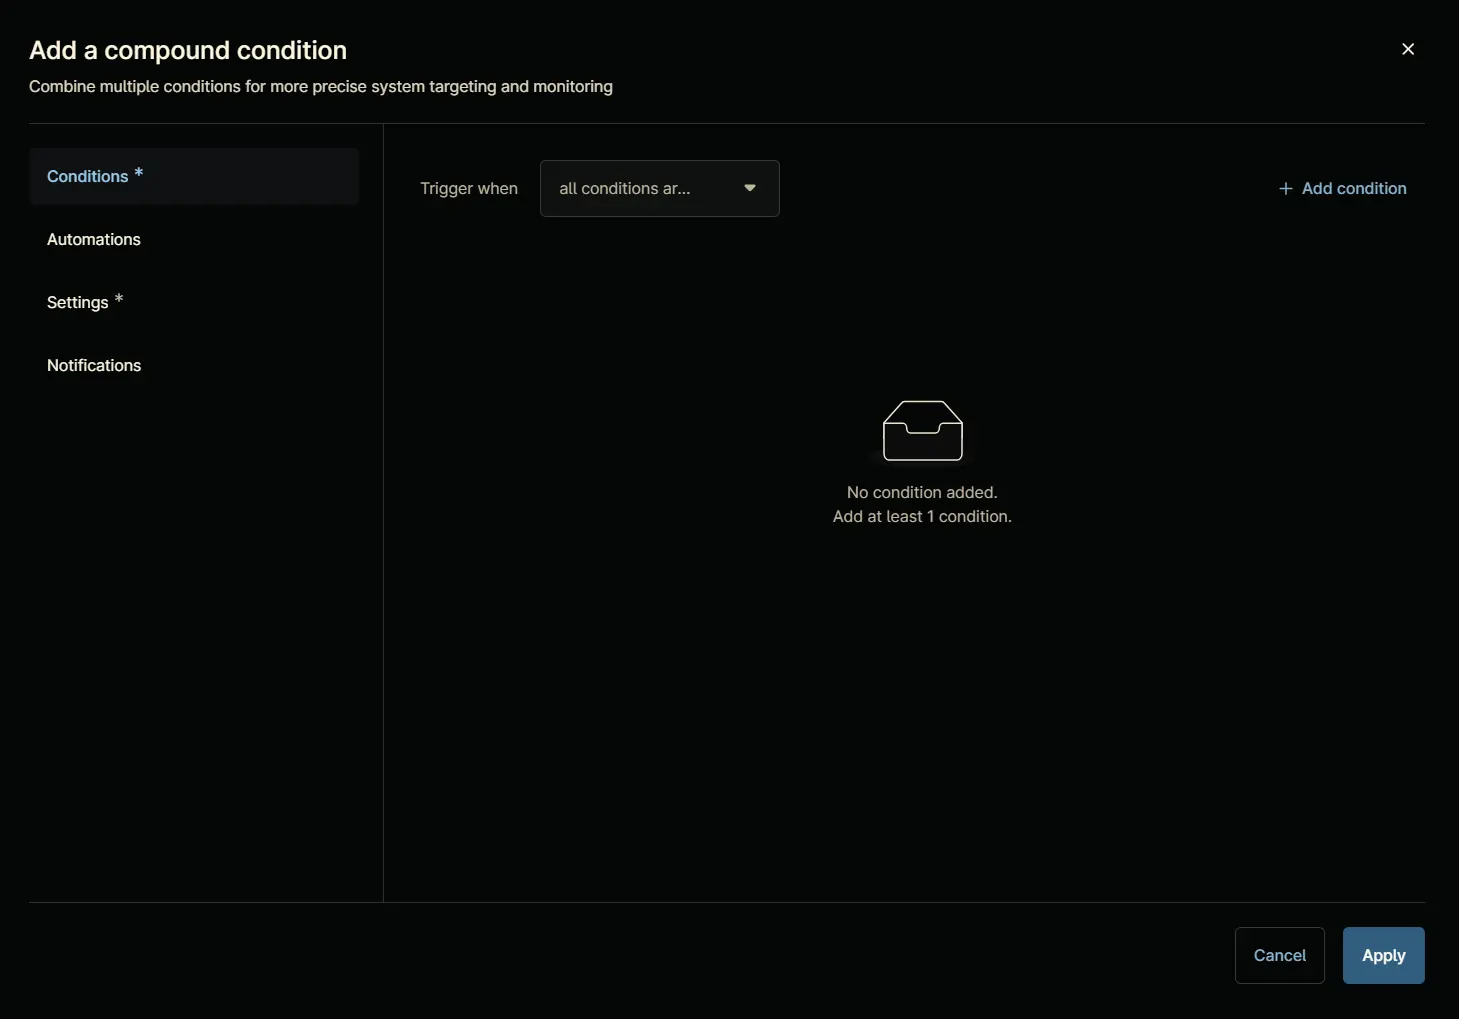
Conditions
Condition 1: Software
Click the + Add condition button.

Select the Software option from the list that will appear after clicking the + Add condition button.

Add Software Condition screen will appear on selecting the Software option:

Configure the Add Software Condition as follow:
Software Name: DiscoveryAgent
Trigger when: Any Software Doesn't exist

Note: The Return key must be pressed after pasting the name to set the Software Name.
Click the Apply button to save the software condition.

Condition 2: Custom fields
Click the + Add condition button.
Select the Custom fields option from the list that will appear after clicking the + Add condition button.

Add custom fields condition screen will appear on selecting the Custom fields option:
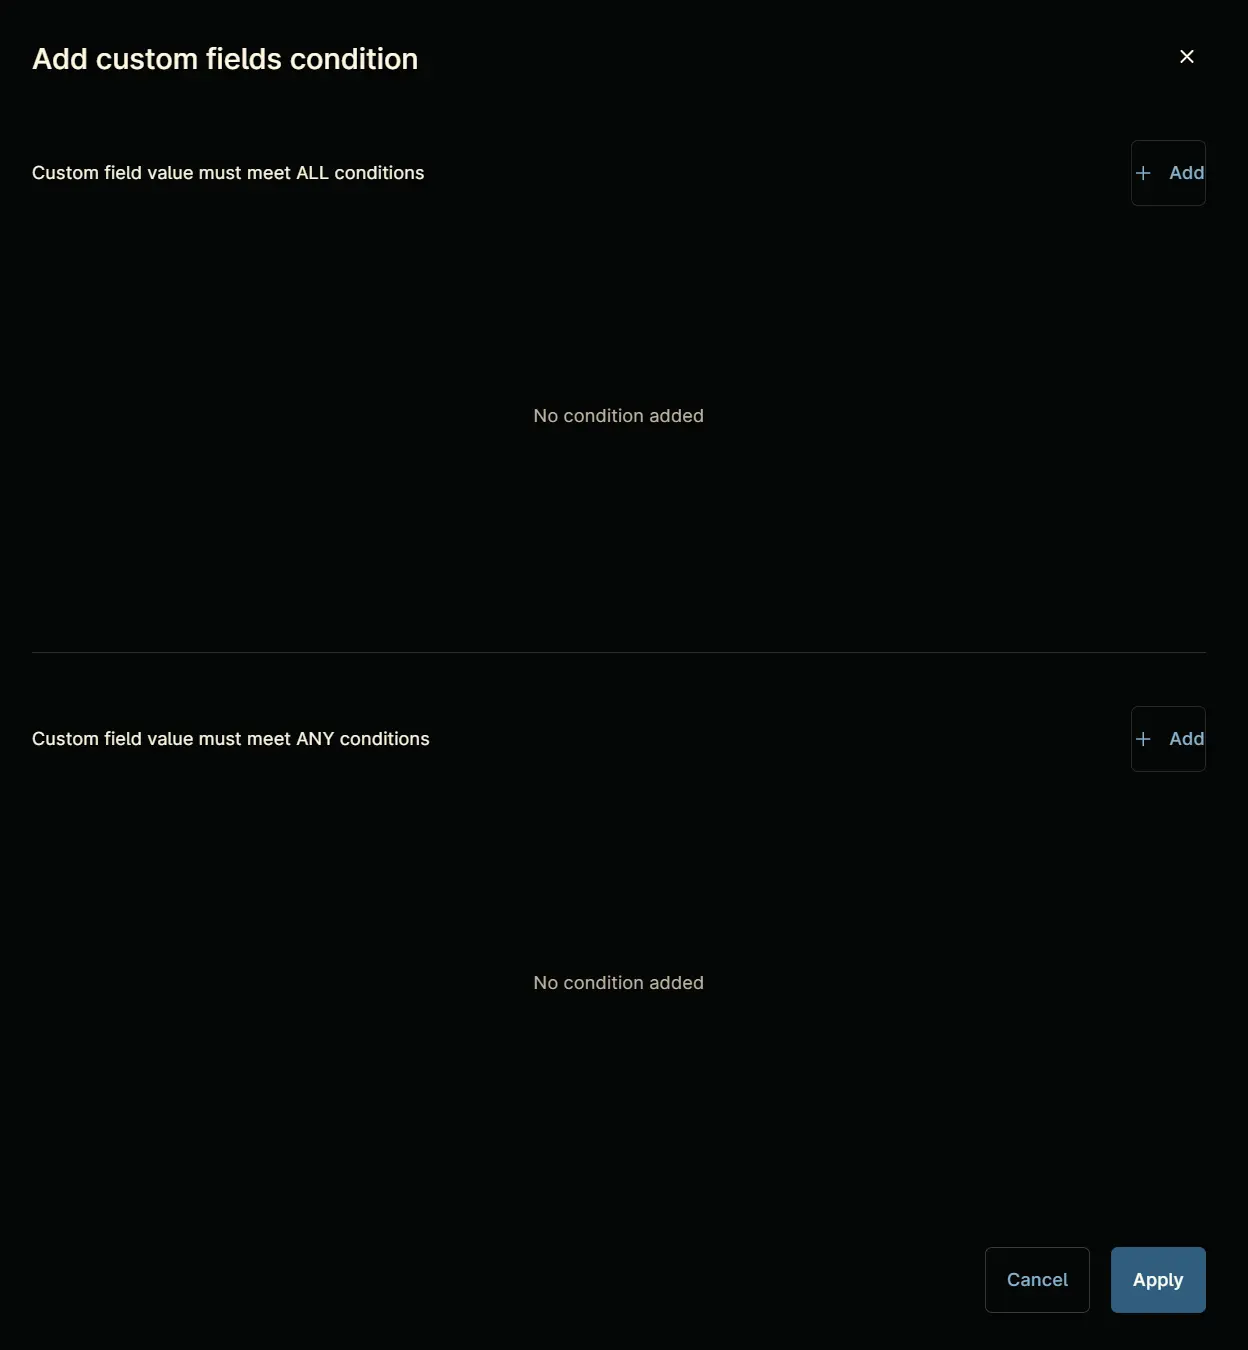
Click the + Add button within the upper section labeled Custom field value must meet ALL conditions.

A new row will be added upon clicking the + Add button.

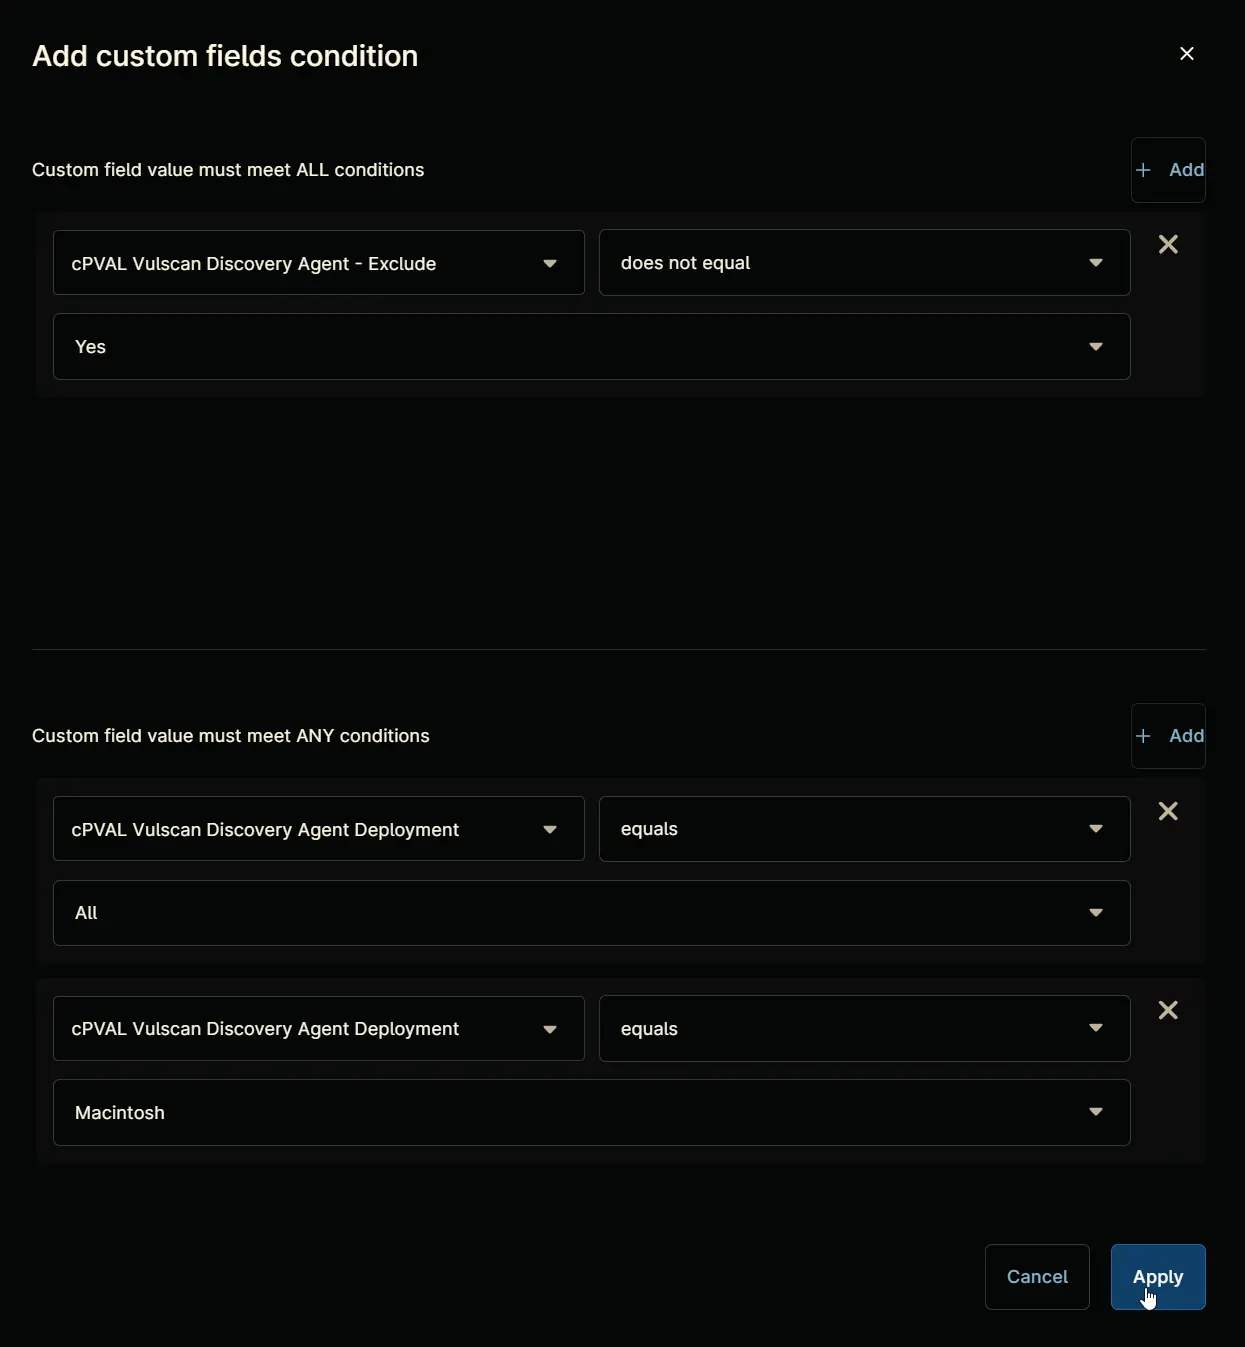
Search and select the cPVAL Vulscan Discovery Agent - Exclude custom field.
Condition: cPVAL Vulscan Discovery Agent - Exclude does not equal Yes

Click the + Add button within the lower section labeled Custom field value must meet ANY conditions.
A new row will be added upon clicking the + Add button.
Search and select the cPVAL Vulscan Discovery Agent Deployment custom field.
Condition: cPVAL Vulscan Discovery Agent Deployment equals All

Click the + Add button within the lower section labeled Custom field value must meet ANY conditions.
A new row will be added upon clicking the + Add button.
Search and select the cPVAL Vulscan Discovery Agent Deployment custom field.
Condition: cPVAL Vulscan Discovery Agent Deployment equals Macintosh

Click the Apply button to save the custom field condition.
Automations
Navigate to Automations section.
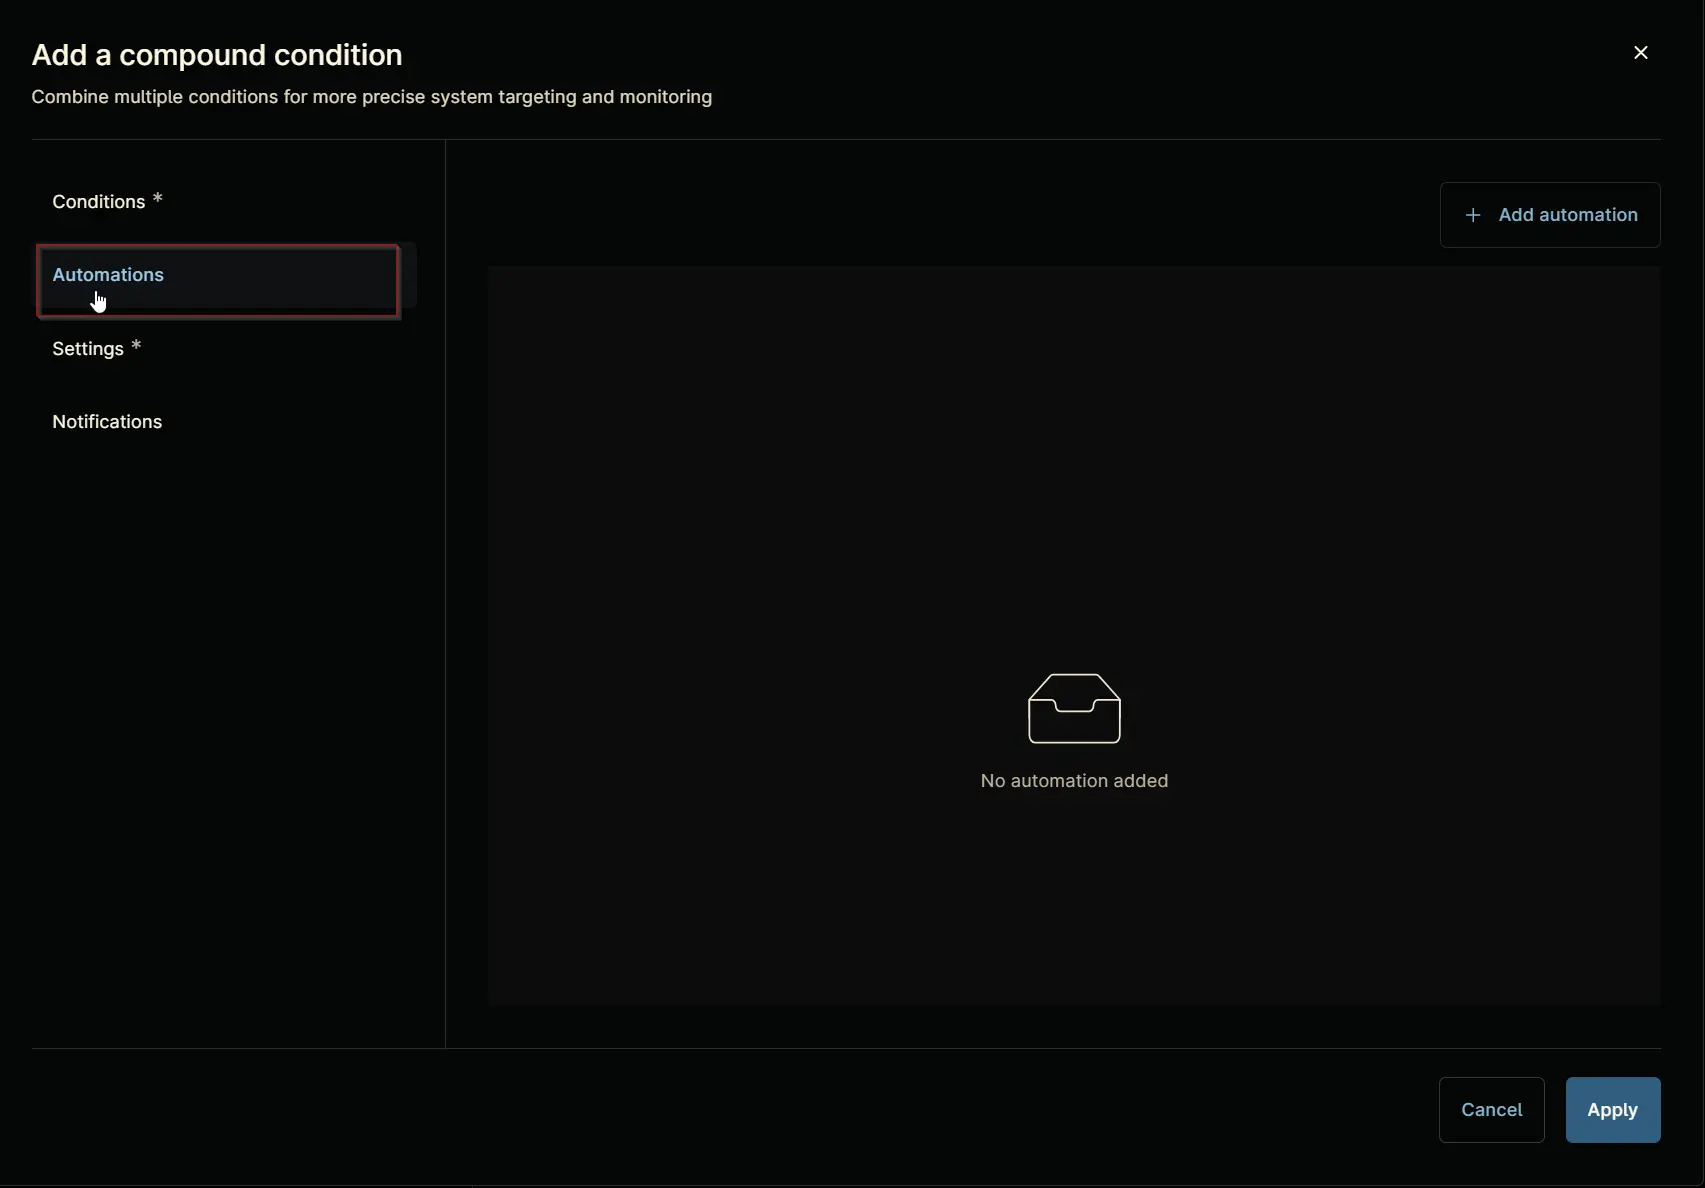
Click the + Add automation button.

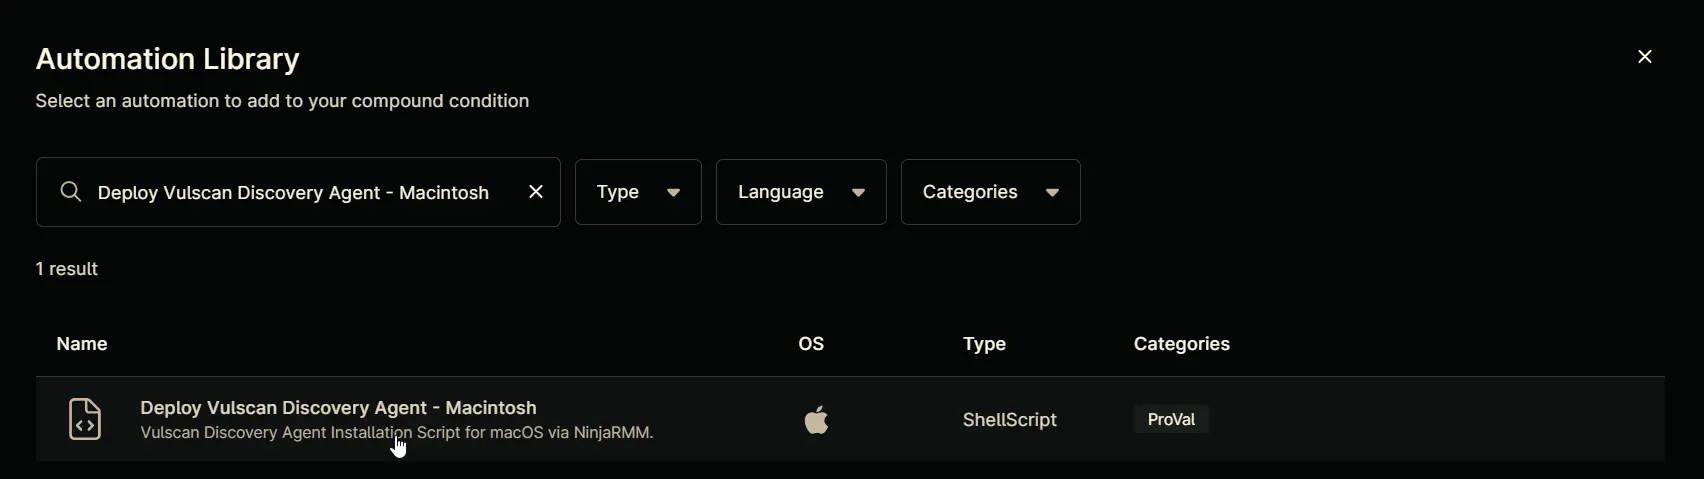
Automation Library will appear upon clicking the + Add Automation button. Note that existing automation library may vary across different environments. The provided screenshot is for demonstration purposes only.
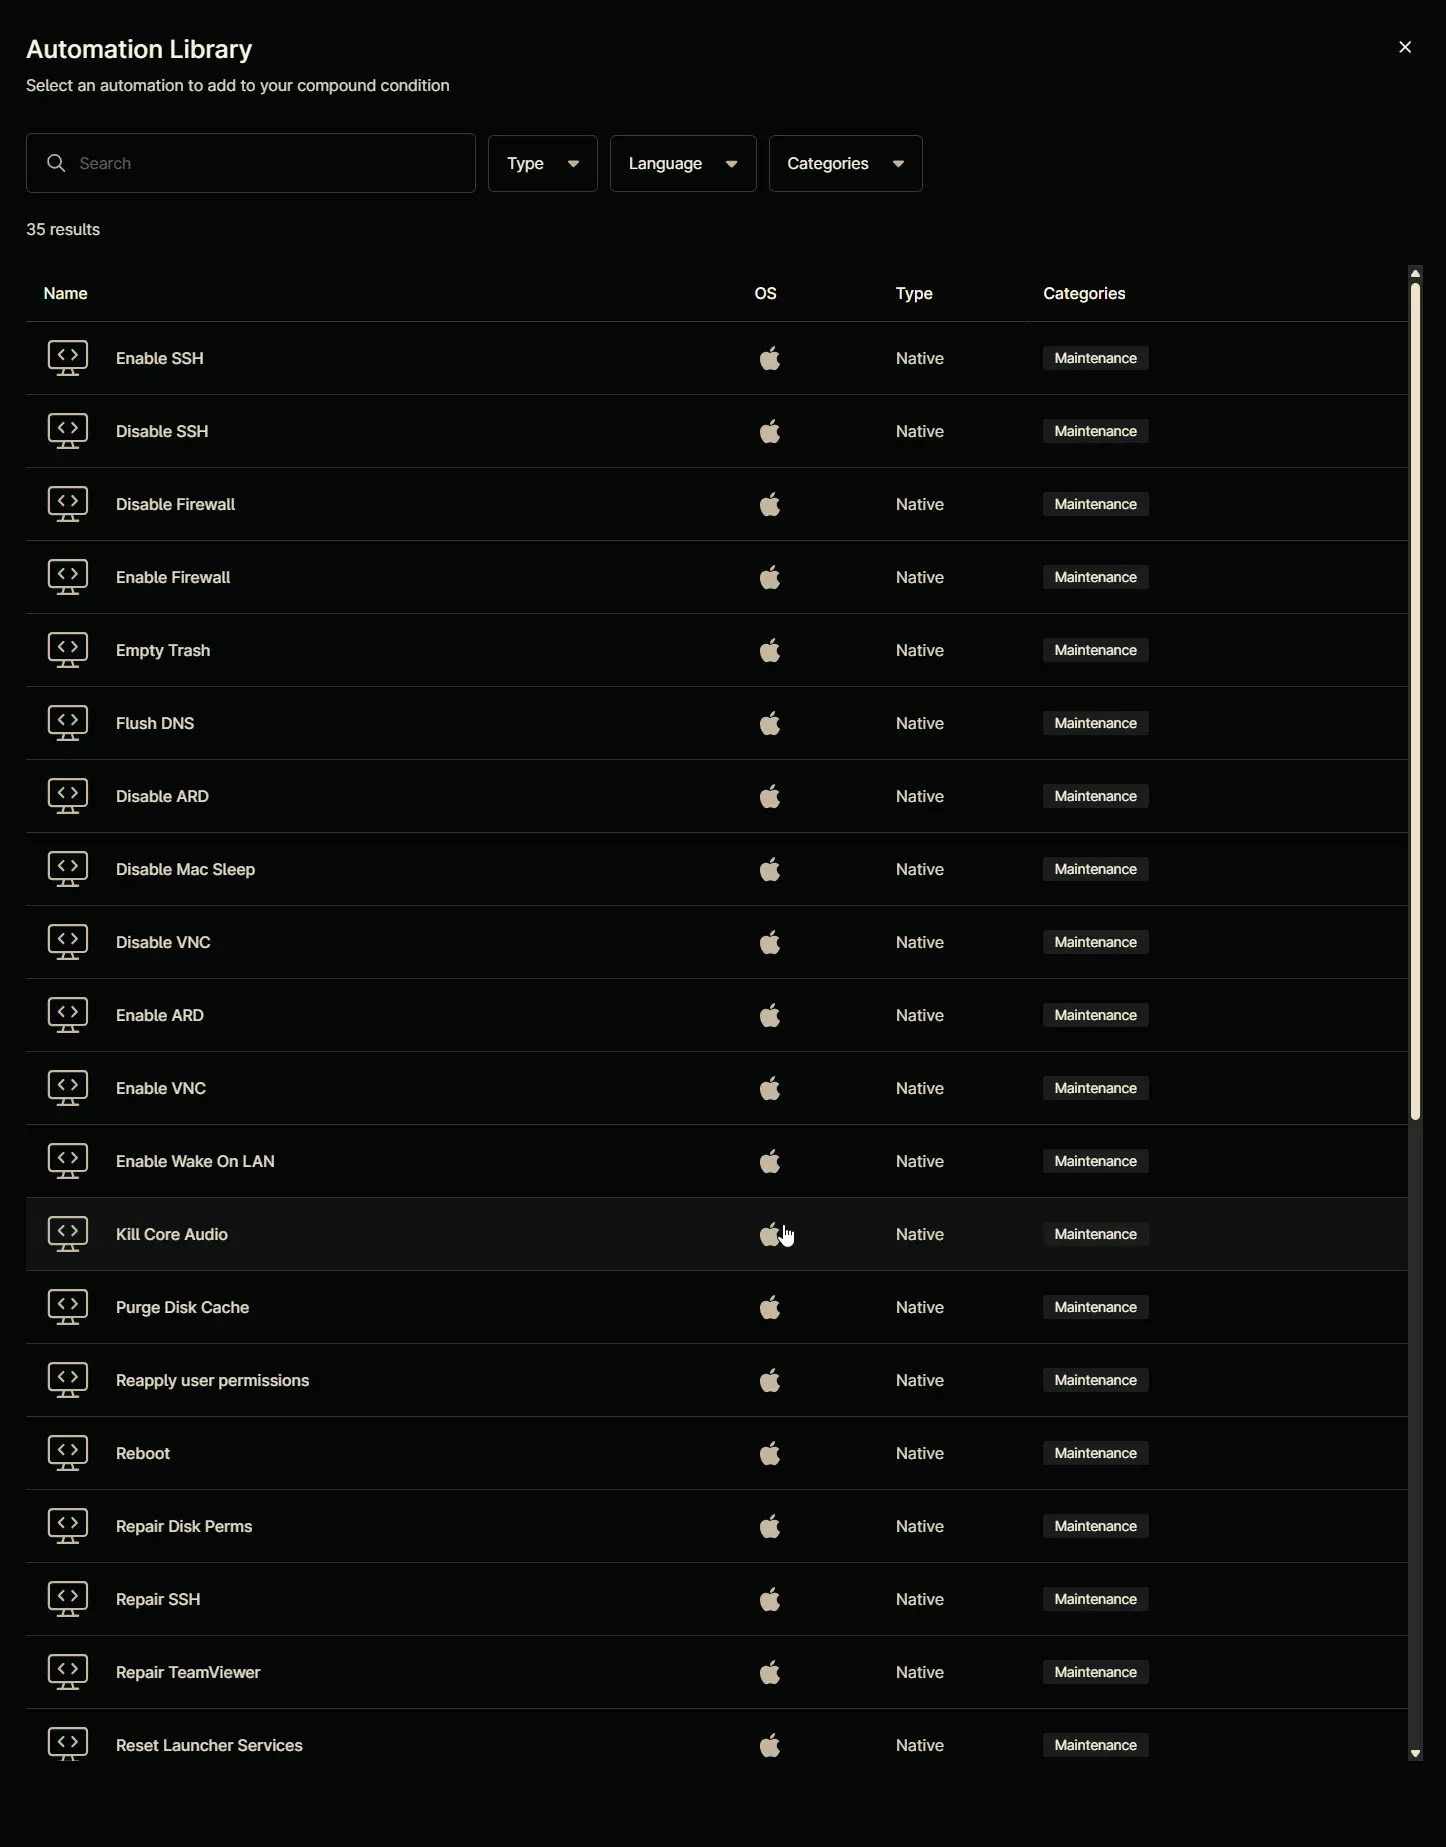
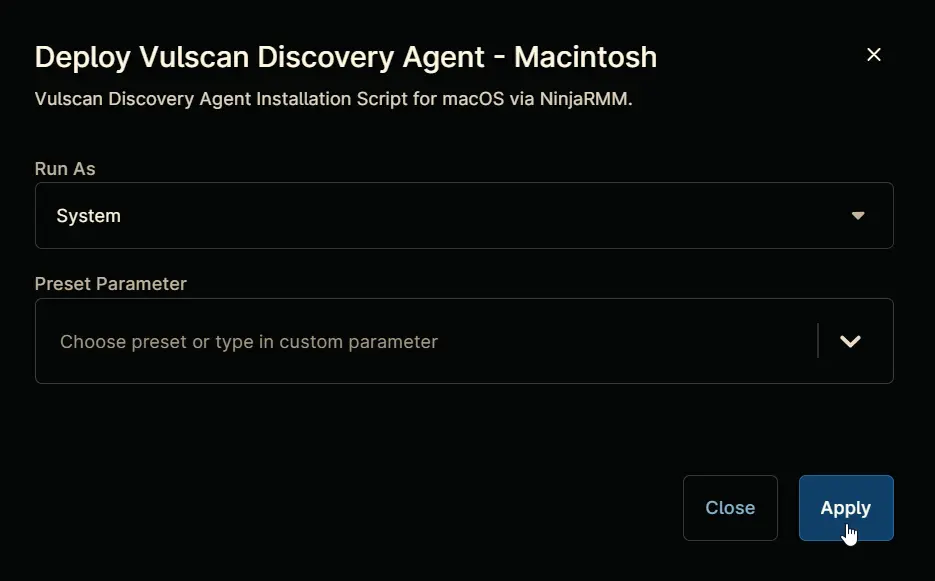
Search and select the Deploy Vulscan Discovery Agent - Macintosh script.
Click the Apply button to add the automation.
Completed Automation Section:

Settings
Navigate to Settings section.
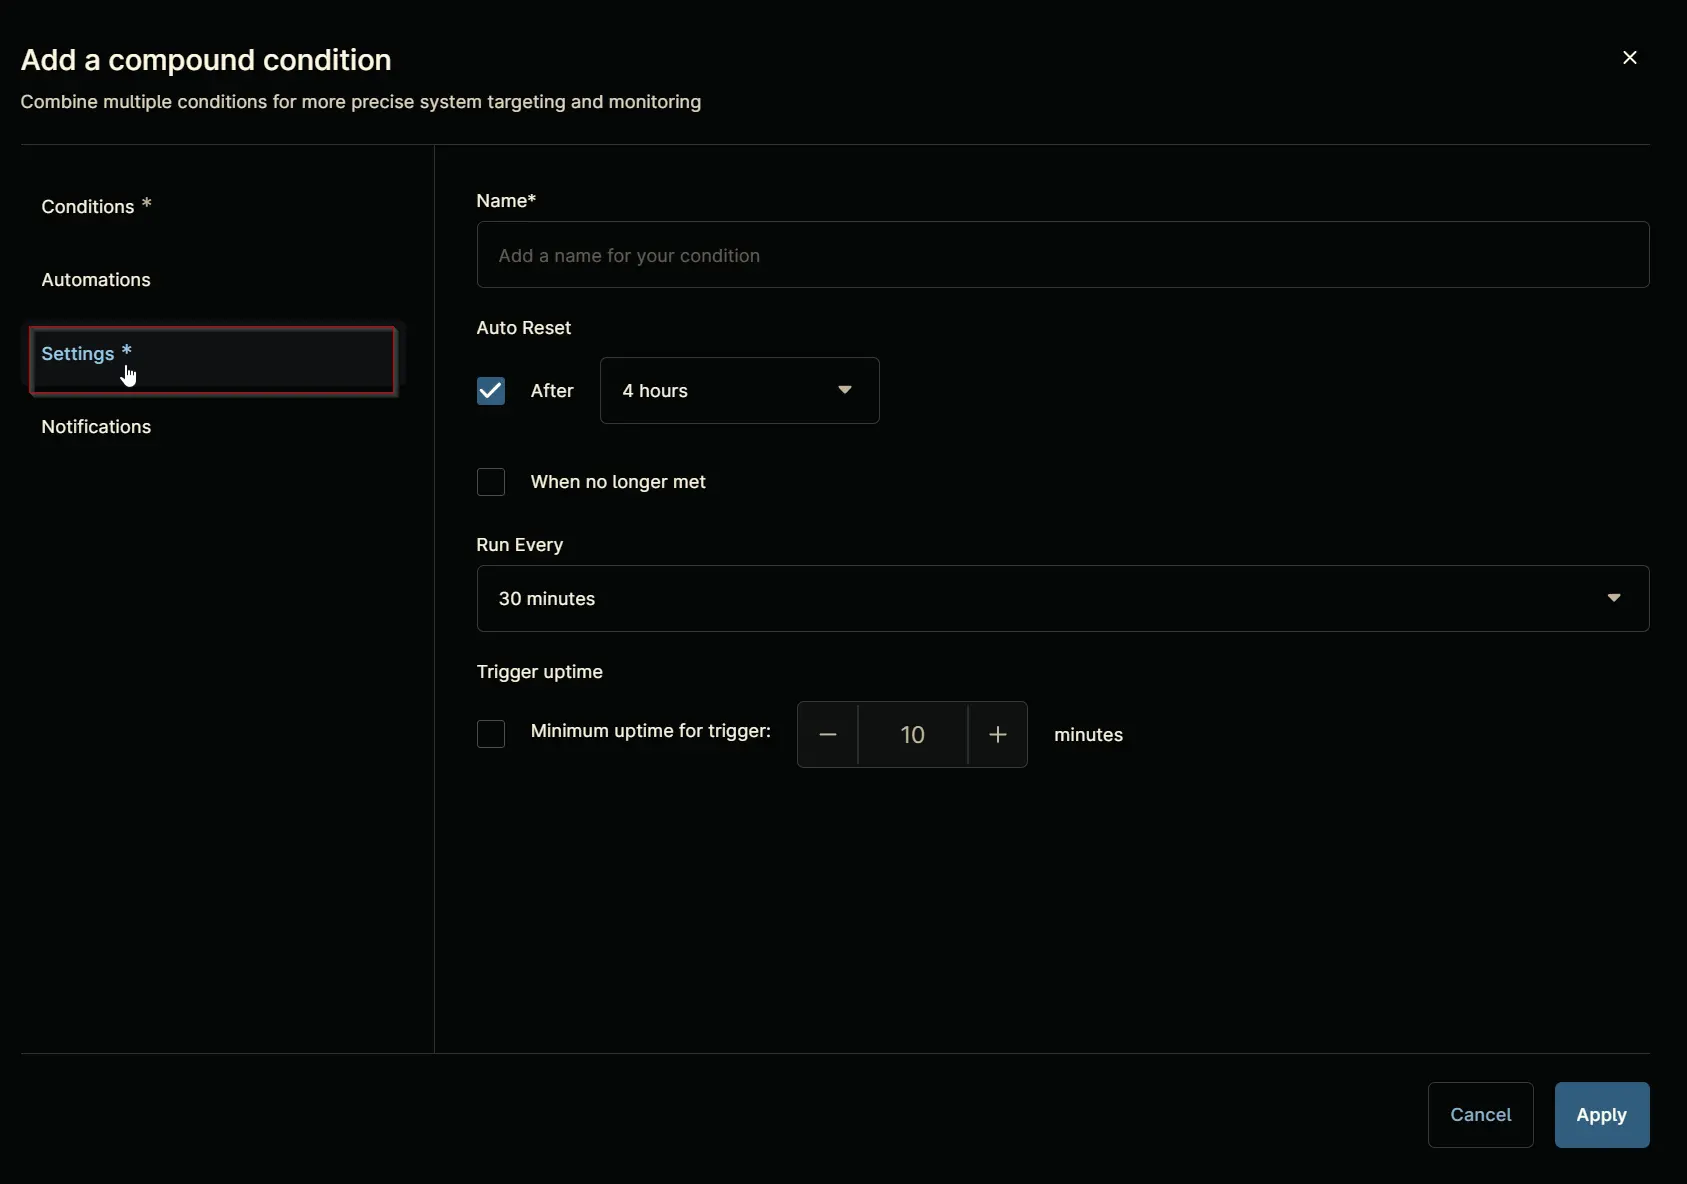
Set the Settings section as follows:
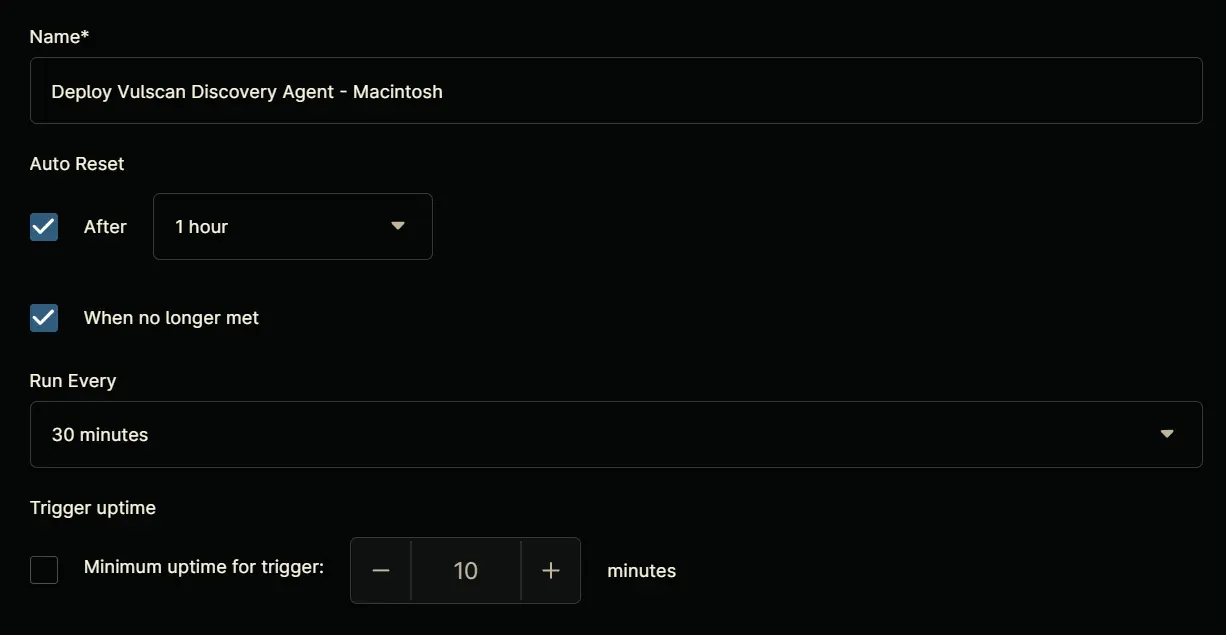
Name: Deploy Vulscan Discovery Agent - Macintosh
Auto Reset:
- After:
True1 hour - When no longer met:
True
Run Every: 30 Minutes
Trigger uptime: False
Notifications
Leave the Notifications section untouched.
Completed Component
Click the Apply button at the bottom to save the compound condition.

Saving Agent Policy
Click the Save button located at the top-right corner of the screen to save the agent policy.

You will be prompted to enter your MFA code. Provide the code and press the Continue button to finalize the process.

Changelog
2025-04-18
- Initial version of the document