CW RMM - Ninja Migration Custom fields
Summary
This document contains the custom fields that are used in the CW RMM to Ninja migration
Details
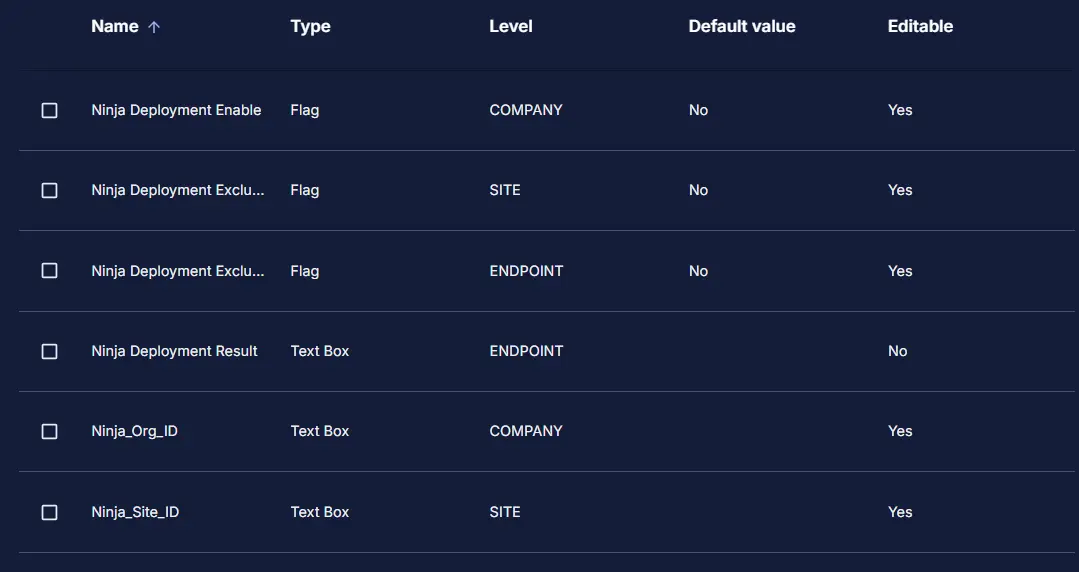
| Name | Level | Type | Default? | Required | Editable | Description |
|---|---|---|---|---|---|---|
| Ninja Deployment Enable | Company | Flag | No | True | Yes | Checking this flag will enable the Ninja Deployment on the company agents. |
| Ninja Deployment Exclude | Site | Flag | No | False | Yes | Checking this flag will exclude the site endpoints from the Ninja Deployment. |
| Ninja Deployment Exclude | Endpoint | Flag | No | False | Yes | Checking this flag will exclude the endpoint from the Ninja Deployment. |
| Ninja_Org_ID | Company | Text | False | Yes | This will install the NinjaRMM at the organization level based on the token provided. | |
| Ninja_Site_ID | Site | Text | False | Yes | This will install the NinjaRMM at the site level based on the token provided. | |
| Ninja Deployment Result | Endpoint | Text | False | No | This stores the success or failure result of the Ninja Deployment script. |
Creation Process
Step 1
Navigate to Settings ➞ Custom Fields
Step 2
Locate the Add button on the right-hand side of the screen and click on it.

Provide the values as provided in the details section to the custom fields requirement and add them one by one.
Completed Custom Field
Changelog
2025-04-30
- Initial version of the document